REVIEW – Camera tech has come far enough that anyone with a smartphone, a microphone, and a light or two can shoot video that looks genuinely professional. So it’s no surprise the camera accessories market has followed, offering gear that goes way beyond selfie sticks and clip-on lenses.
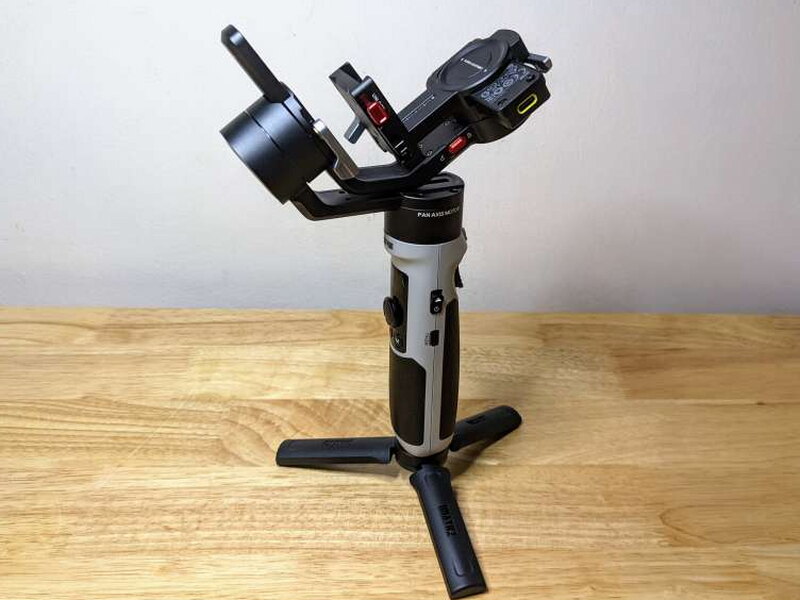
If there’s one thing every videographer needs, pro or hobbyist, it’s a decent gimbal to smooth out the shakes while you’re moving. I got my hands on the Zhiyun Crane M2S, a 3-axis stabilizer built for smartphones, action cams, and lighter mirrorless bodies. A few limitations aside, this entry-level gimbal packs in a lot of features, is genuinely fun to use, and comes in at a fair price, $349 for the Combo Kit I tested or $269 for the Standard Kit.
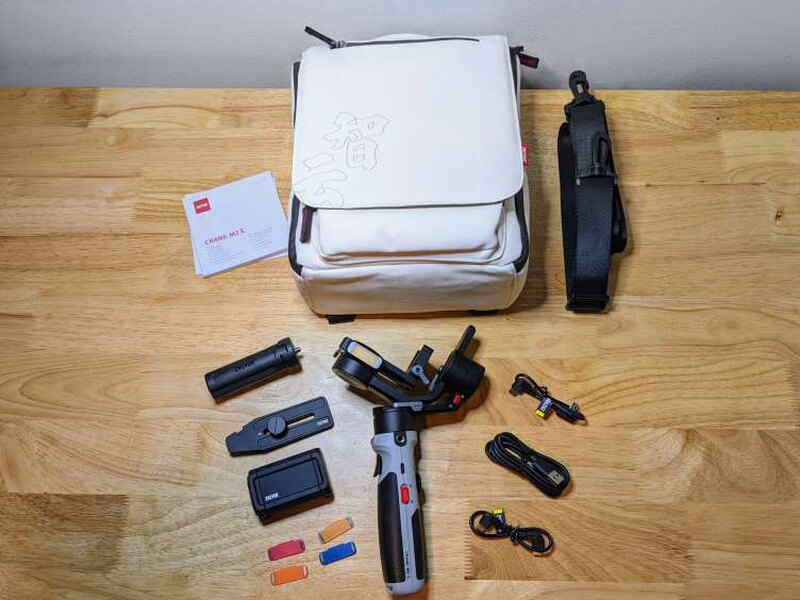
What’s in the Box
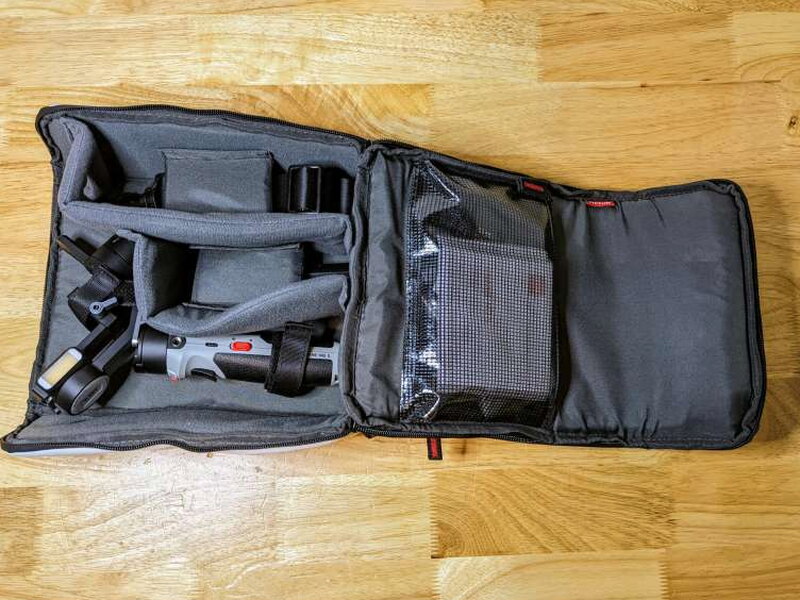
My Combo Kit arrived in a plain white box, everything tucked snugly into the carrying case that ships with it.

- Zhiyun Crane M2S Camera Stabilizer
- Quick Release Plate
- Mini Tripod
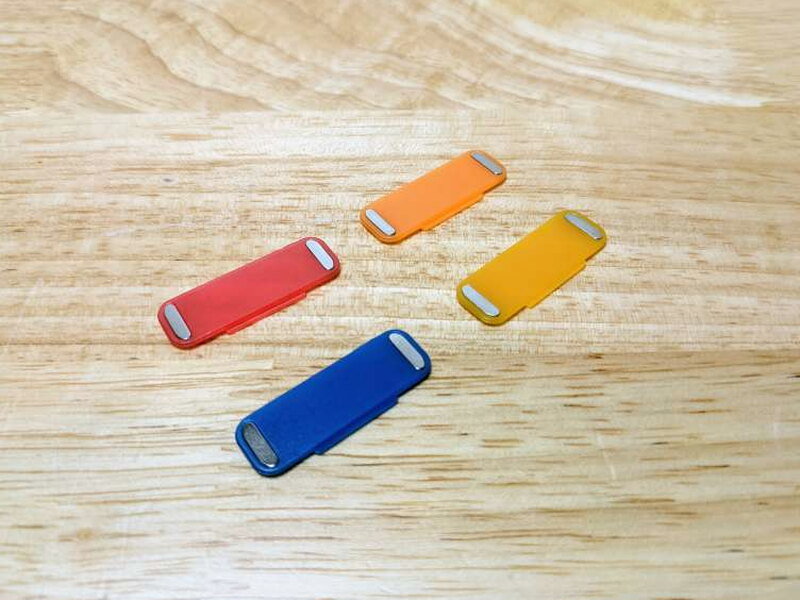
- 4 – Fill Light Filters
- USB-A to USB-C Charging Cable
- USB-C to Micro USB Camera Control Cable
- USB-C to USB-C Camera Control Cable
- Phone Clamp
- Carrying Case and straps
- Quickstart Guide
Go with the Standard Kit instead of the Combo and you skip the case and the phone clamp.
Specs You Should Know
- Tilt Mechanical Range: 320°
- Roll Mechanical Range: 320°
- Pan Mechanical Range: 360°
- Controllable Tilt Angle: -60° – +160°
- Controllable Roll Angle: -30° – +30°
- Controllable Pan Angle: Unlimited 360° Rotation
- Operation Voltage: 9.6V – 12.6V
- Operation Current: 135mA – 4000mA
- Output Voltage (Camera Control Port): 5V
- Output Current (Camera Control Port): 1A – 1.2A
- Operation Temperature: 10° – 50°
- Battery Capacity: 1150mAh
- Battery Runtime: 10H 35min
- Charging Time: 1H 41min
- Gimbal Net Weight: 548g
- Quick Release Plate Weight: 41g
- Tripod Weight: 53g
- Gimbal Size (Folded): 9.25 x 5.82 x 2.71in (235 x 148 x 69mm)
- Gimbal Size (Expanded): 10.29 x 4.85 x 4.25in (261.4 x 123.25 x 108mm)
- Bluetooth: v5.0
- EIRP: <10dBm
- Operation Frequency: 2.4GHz
- Camera Charging: Able to charge 5V/1A cameras
- Display Screen Size: 0.66in
The Carrying Case
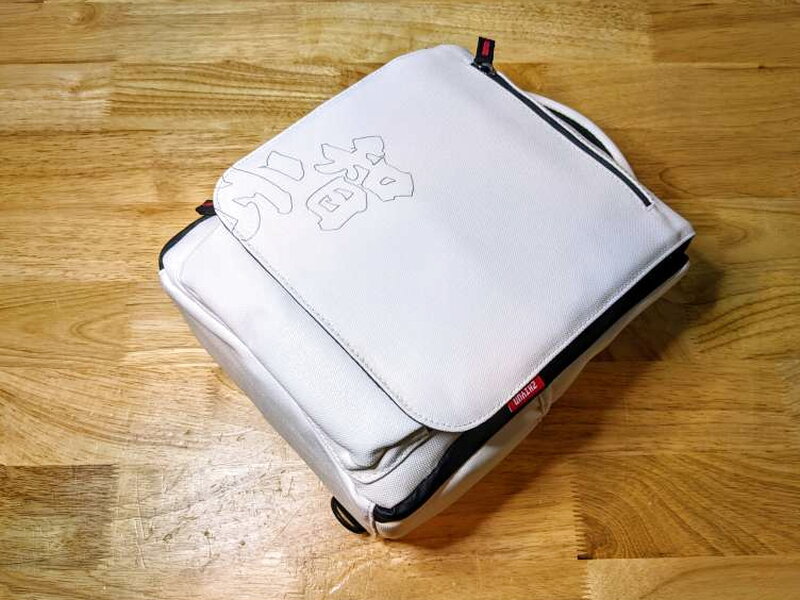
Much of the value in this kit comes down to the accessories bundled in, and for a lot of people the standout will be the carrying case. It does a genuinely good job shielding the gimbal and keeping every small accessory from wandering off.

The outside has a couple of side pockets plus two separate zippered compartments, and the front flap carries an embossed Zhiyun logo.
The lower interior is lined with cushioned material and comes with adjustable Velcro dividers and straps to keep the gimbal from shifting around.
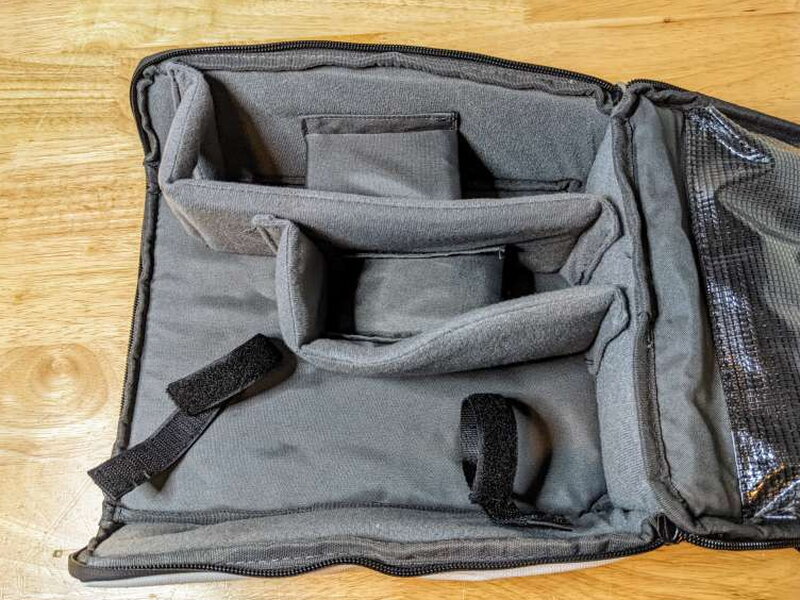
The upper interior has yet another large zippered compartment, good for stashing cables and small parts.
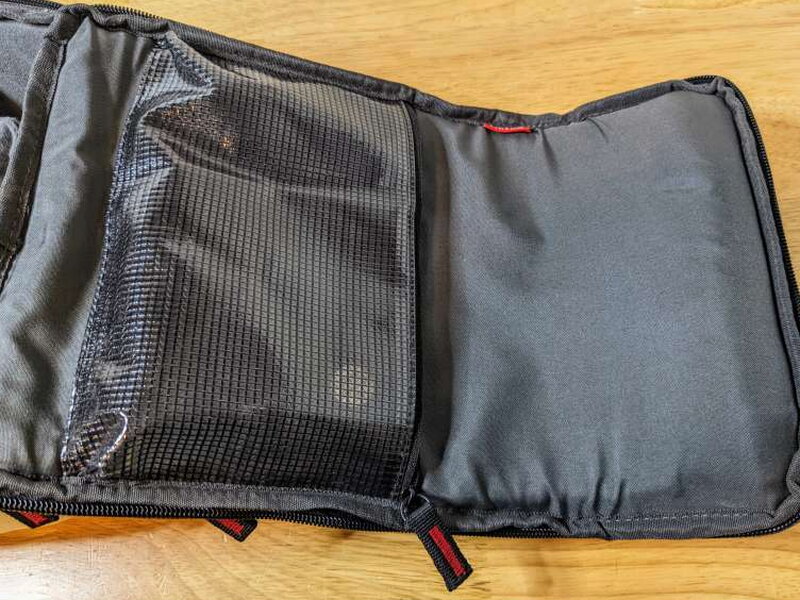
Straps come included too, and you can rig the case as either a backpack or a shoulder bag.

Cables and Fill Light Filters
For hooking up to cameras and power, the M2S ships with three cables: two for camera control and one for charging. The control pair covers USB-C to USB-C and USB-C to Micro USB, while charging runs USB-A to USB-C. No charging block is included.

Hands down the neatest accessory in the box is the set of colored fill light filters. These small plastic gels snap onto the M2S’s built-in fill light magnetically and tint it red, orange, yellow, or blue. Not everyone will get regular use out of them, but it’s a fun touch.
Quick Release Plate, Phone Clamp, and Tripod
One of the M2S’s cleverest touches is its quick release plate. It’s an aluminum plate with a standard 1/4″-20 thread that bolts to the underside of a camera, then locks onto the gimbal frame with a safety latch. Grab extra plates and you can leave one mounted to each camera, making swaps quick.

For smartphones, the Combo Kit includes a spring-loaded phone clamp that mounts to the quick release plate and grips just about any standard to large phone. I ran mine with a Pixel 5 and an older iPhone without issue, though I’d guess something like a Pixel 6 Pro or an iPhone 13 Pro Max would test the clamp’s limits.

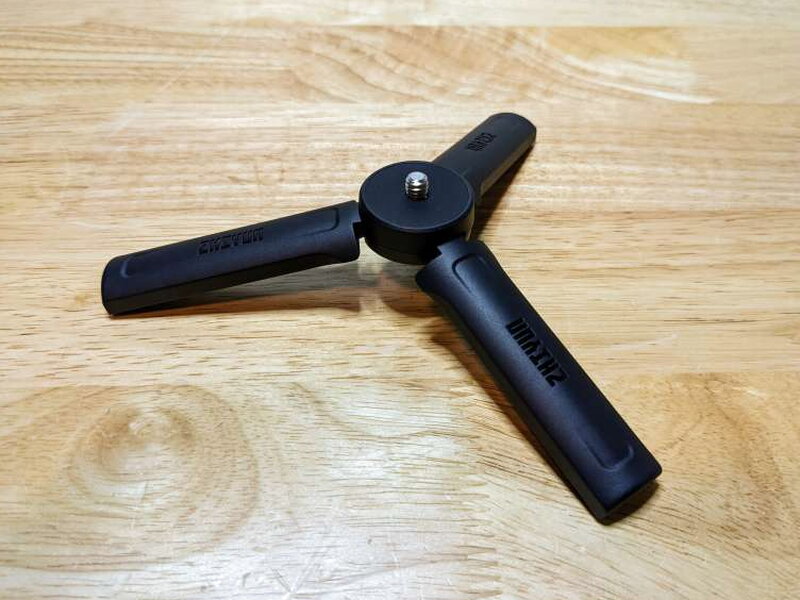
A simple folding mini tripod rounds out the kit, and it earns its keep for both still and moving shots since it adds length to the gimbal and makes it easier to handle.
The Gimbal Itself
The Crane M2S is built from a mix of aluminum and plastic. Every one of the main moving parts is aluminum, and so are the axis locks and adjustment clamps.

The bottom half is plastic wrapped in a textured, rubber-like grip. Hold it the right way and the small 0.66-inch screen faces you, showing status info and menu items.

Controls cover this section of the handle. Beyond the screen there’s a directional joystick, a red record/stop button, and a mode button, all within thumb’s reach.

Controls and Ports, Side by Side
The right side of the handle has the power switch and the menu button.
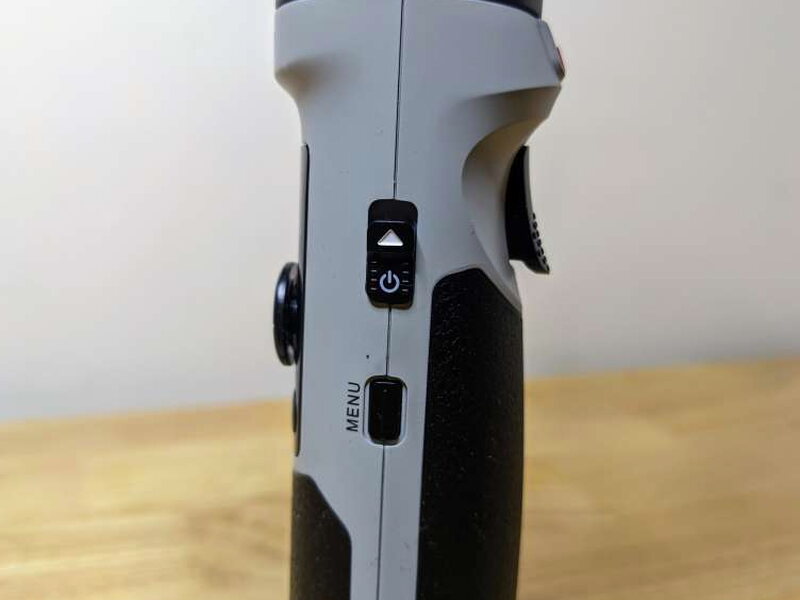
Up front sits the trigger, right alongside the pan axis lock.

The left side has the fill light control switch and a USB-C charging port.
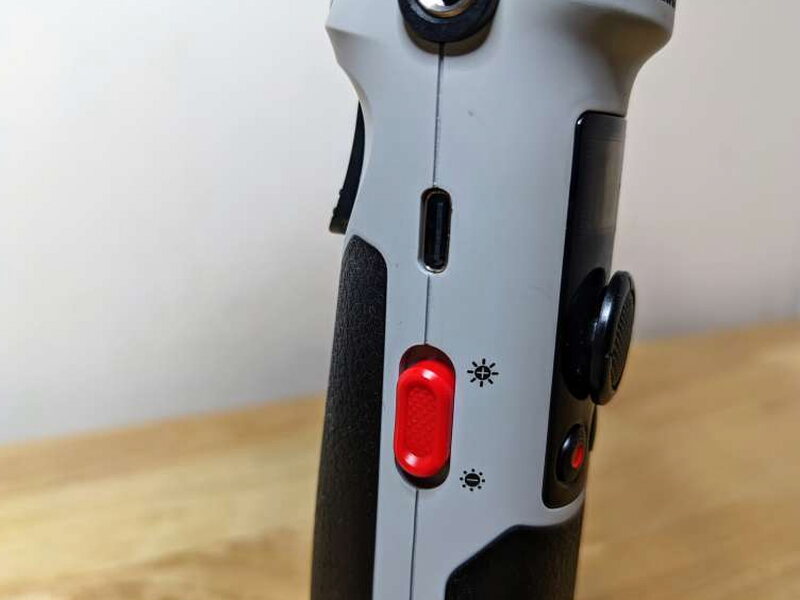
Flip to the bottom of the handle and there’s a 1/4″-20 accessory thread for attaching a tripod.

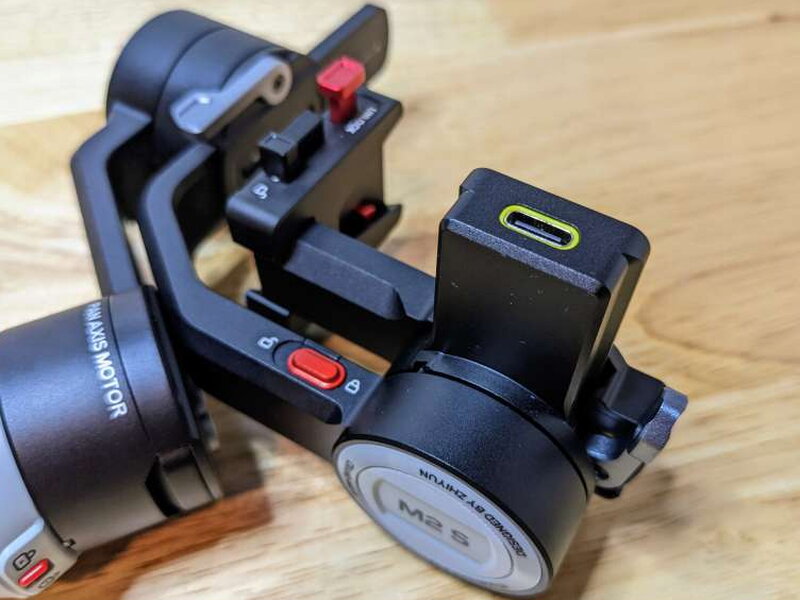
Up top, every axis lock is painted red so you can spot them at a glance, while the USB-C camera control port is marked in yellow.

Most cameras on the compatibility list (located here) can plug into this port with the included cable, letting the camera charge and be triggered by the record/stop button. That button does nothing for smartphones hooked up this way, though they’ll still charge. The cable occasionally got in the way of the gimbal’s rotation, so I mostly avoided using it.
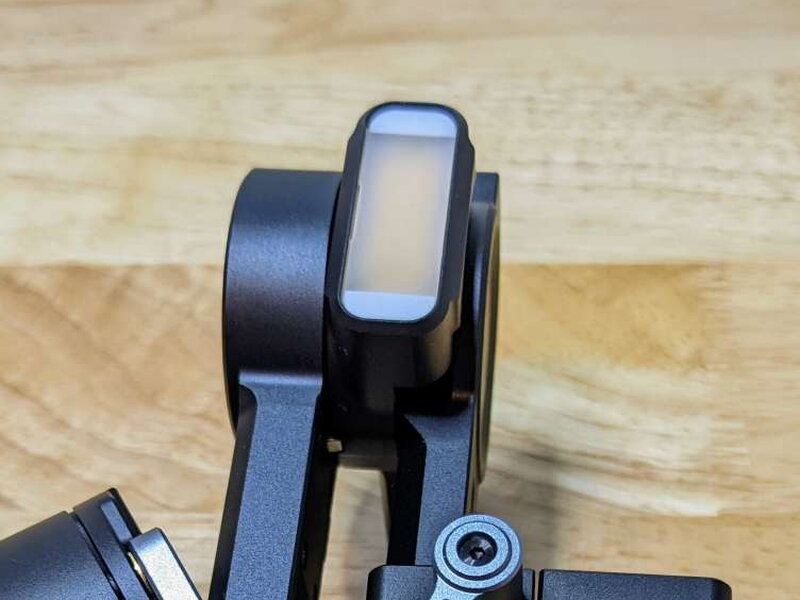
Built into the head is a fill light rated up to 1000 lumens, adjustable across five brightness levels. It’s shockingly bright, and honestly I only got good use out of it somewhere between medium and its lowest setting.
Setting It Up
Getting the M2S ready takes real effort, and one of the bigger drawbacks is how much time a first-timer sinks into balancing and calibrating it for each new camera or phone. Depending on what you’re mounting, that first setup can get genuinely aggravating.

The gist: whatever you’re mounting has to be perfectly balanced before you switch the gimbal on. You lock all the axes, then release them one at a time along with each adjustment clamp, sliding the camera or phone along that axis until it settles into balance. Only once everything balances across all three axes can you power on the M2S, and only with the axes unlocked, otherwise it throws an Axis Lock error and goes to sleep. The printed guide barely covers most of this, so the online guide located here is the better resource.

Another chunk of setup is installing the ZY Play app, which lets you run the M2S remotely, as long as the phone running the app isn’t the one you’re shooting with. Depending on the phone, it also unlocks panoramas, time-lapses, and trajectory photography, plus a way to further calibrate the gimbal through a six-side stabilizer calibration and motor fine-tuning.

Once calibration wraps up, it’s worth checking for firmware updates by hooking the gimbal to a computer with the USB-A to USB-C cord. Updating means downloading three separate files, and the user guide walks through the process.

Last step is making sure it’s topped off. It runs roughly 8-10 hours depending on use, and a full charge from empty takes about 1 hour 41 minutes.
Living With It
There’s a lot packed into this gimbal, and I tried every feature with mixed results. That little display turned into a real lifesaver, always confirming which mode I was shooting in, and navigating the menus with the joystick got smoother with practice.

Since I don’t own a mirrorless camera or action cam, I shot everything with my Pixel 5. Its weight was never much of a burden for the M2S, though every so often the motors did something weird. It makes me a little nervous that a heavier mirrorless body with a big lens might strain the motors, even one on the compatible list.
I tried controlling it both from the device itself and through the ZY Play app. The joystick worked fine but was never quite consistent for precise moves, it tended to either race ahead or crawl. The app didn’t do much for me since I’d installed it on the same phone I was shooting with, it would have been far more useful for remotely running a mirrorless camera. That mirroring function, though, is genuinely impressive.
With the ZY Play app, the gimbal can mimic the movement of any device running the app. In this clip I’m steering the M2S with my Shield tablet, since my Pixel 5 was busy recording the actual video.
The app can also drive the gimbal remotely through a virtual joystick.
Shooting Modes
The M2S offers seven shooting modes: Pan Follow, Follow, Lock, POV, Vortex, Portrait, and Go. I shot a ton of test footage, but only three clips were worth including here, the modes most people will actually reach for: Pan Follow, Follow, and Lock. I gave Vortex a serious try too, but I could never line up my Pixel 5’s lens with the gimbal’s main axis, and without that the effect just looked off.
In Pan Follow mode (PF), the tilt and roll motors stay locked while the camera turns along with the handle as you pan side to side. Nudge the joystick up or down to adjust tilt, left or right to steer pan. You can still catch my steps rising and falling in the footage, but it’s noticeably steadier than holding a phone bare with no gimbal at all. Most videographers lean on a technique called the Ninja Walk to cut down on that bounce even further.
Follow mode (F) locks the roll motor while tilt and pan track the handle’s rotation. Push the joystick up or down for tilt, left or right for horizontal orientation. This has become my go-to mode whenever I want genuinely smooth movement.
In Lock mode (L), all three axes hold their angle, so the camera’s orientation stays fixed no matter how the handle turns. Move the joystick up or down to shift tilt, left or right to change orientation. I lean on this one mostly for low shots, like trailing my dog on walks around the park.
The rest of the modes, for the record:
- Point of View mode (POV): All three motors move when the handle is rotated.
- Go mode (GO): The roll axis motor is locked, and the tilt and pan motors quickly follow the handle’s rotation.
- Portrait mode (P): The tilt motor rotates upward by 90° and the pan axis rotates 90° for vertical shooting.
- Vortex mode (V): The tilt motor rotates upward by 90°, and tilt, roll, and pan motors all follow the handle’s rotation. The joystick’s left/right push controls pan rotation.
The Crane M2S still keeps me entertained, and I keep finding new ways to fold its features into whatever I’m filming. I doubt I’ll ever touch every single function, but that’s fine given it’s my first gimbal and an entry-level one at that. Any complaints feel pretty small once you factor in the price, the build quality, and how much is packed in. Now that I’ve used it, I sort of wish I’d picked up a gimbal years ago.
What I Liked
- Included fill light and filters
- Lightweight yet durable
- Stays calibrated after initial leveling
What Could Be Better
- Charging cable interferes with gimbal movement
- Can’t control smartphone record/stop functions from the device
- Initial calibration can be frustrating
Quick Questions
Q: Does it include a charging block?
A: No, only cables are included – a USB-A to USB-C charging cable and two camera control cables, no wall adapter.
Q: Can the smartphone’s record button be controlled from the gimbal?
A: No, when a phone is connected via the camera control port it charges but the button doesn’t trigger recording; that only works with compatible cameras.
Q: How long does the battery last?
A: Roughly 8-10 hours depending on use, with a full charge from empty taking about 1 hour 41 minutes.
Q: How many shooting modes does it offer?
A: Seven – Pan Follow, Follow, Lock, POV, Vortex, Portrait, and Go.
Bottom Line
Being my first gimbal, the Zhiyun Crane M2S left a strong impression. For the price, it packs in features you’d usually only find on far more expensive stabilizers. Setup can be slow and a little maddening, but the moment you’re actually rolling footage, it’s genuinely fun. I wish it handled more cameras, but I get that hitting this price point meant some weight trade-offs. For anyone shooting mainly with a smartphone or action camera, the Crane M2S earns its keep, warts and all. The Combo Kit I tested may not feel like a bargain to everyone at $349, especially if you already own a camera bag, and while the Standard Kit is a solid value at $269, remember it drops the phone clamp.
Price: $349 for the Combo Kit as reviewed, $269 for the Standard Kit
Product Link: Zhiyun
Source: The sample of this product was provided by Zhiyun.


