
REVIEW – Camping season means sorting out food logistics again, and that’s always the part that trips me up. Car camping is easy since my FJ Cruiser can haul as much cooking gear as I want, but backpacking is a different story when everything has to fit on my back. I’ve leaned on the Wolf and Grizzly Fire Safe for a while now, but I was itching to step up my cooking game, so Solo Stove sent over the Campfire to see if a slightly bigger setup was worth the tradeoff.
At a glance it just looks like a can with holes drilled in it. It is, sort of, but that simple design throws off way more heat than I expected. It runs a little over $100, which isn’t nothing, but if fast, easy outdoor cooking matters to you the way it does to me, it’s worth a look.
What’s in the Box
The Campfire ships in a box barely bigger than the stove itself, plastered with photos and specs.

Open it up and you get the stove itself, its carrying bag, and a manual.


- Solo Stove Campfire
- Carrying bag
- User manual
Specs You Should Know
- Materials: Grade 304 stainless steel
- Weight: 2.2 lbs.
- Diameter: 7 in.
- Height (with Cooking Ring): 9.25 in.
- Fuel: Sticks, twigs, pine cones and other biomass
- Capacity: Can cook for four or more people
Solo Stove also sells two smaller versions if the Campfire is more stove than you need: the Titan (two people, $84.99) and the Lite (one person, $64.99).
Body and Cooking Ring
The Campfire follows the same basic playbook as the rest of Solo Stove’s lineup: a cylindrical stainless steel bucket with rows of small holes near the bottom on the outside and near the top on the inside.

The build quality stands out right away. Brushed steel, rounded edges on the bottom, and a body that feels like it could take a beating and shrug it off.

The included carrying bag keeps ash contained and away from the rest of your gear, though it’s a snug fit and can be fiddly to wrestle the stove into, especially in the dark.

Two pieces make up the Campfire: the main body and a removable cooking ring that sits on top.


The ring is the same grade 304 stainless as the body, built to perch on top during cooking and nest inside for storage. Three tabs bent at 90 degrees hold a pot or pan up off the ring itself, leaving room for air and heat to circulate underneath.

One section of the ring is cut low so you can feed the fire more fuel without having to lift a pot off first.

Inside the body sits a fixed steel mesh that lets ash fall through without blocking airflow to the fire. I wish it came out for cleaning, but it’s also one less loose part to lose.


The walls are double-layered, pulling cooler air in through the lower vents and pushing it back out the upper vents right into the flame. Solo Stove calls this a secondary burn, and it’s what keeps the fire so clean.

That double wall also keeps the ground underneath from scorching, though fair warning, the outer walls themselves get plenty hot during use.

At just over two pounds and better than nine inches tall with the ring on, this isn’t a stove I’d toss in a backpack when smaller options exist. But for car camping or short overnights where space isn’t tight, it earns its spot.

Gathering Fuel and Getting It Lit
Setup is about as simple as it gets: find level ground clear of anything flammable, then go gather fuel, since the Campfire burns biomass instead of canister fuel.

Finding fuel in a wooded area isn’t hard. Dry twigs, pine cones, and leaves all burn fine, though Solo Stove recommends dry hardwoods like birch, maple, hickory, or oak, broken down to roughly thumb-sized pieces.
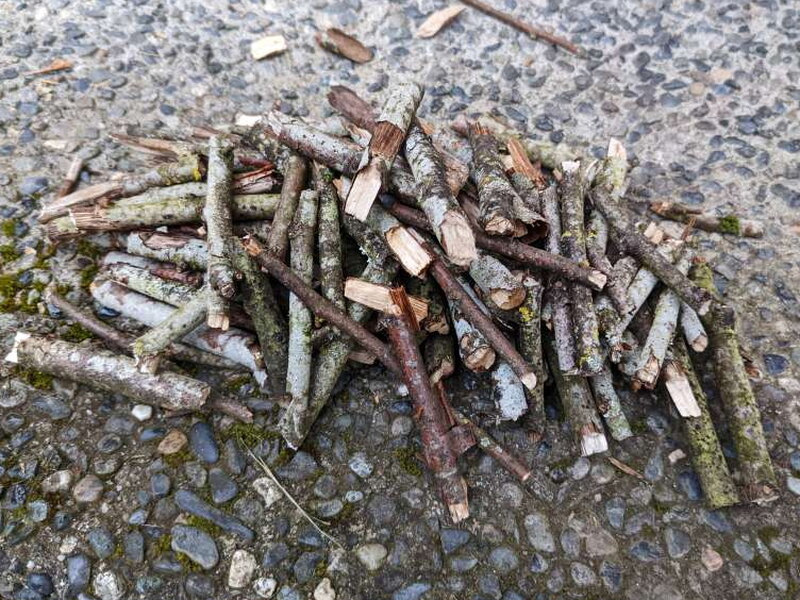
From there it’s just a matter of loading the body and lighting it. You can set the cooking ring on before or after lighting.

Living With It
I was floored by how well this simple design actually works. Two or three handfuls of twigs, a couple of pine cones, and a bit of dryer lint got a hot, nearly smokeless fire going in about a minute.

The only real smoke came early on, courtesy of Pacific Northwest moisture still soaked into our wood. Once that burned off, smoke all but disappeared and the heat took over.
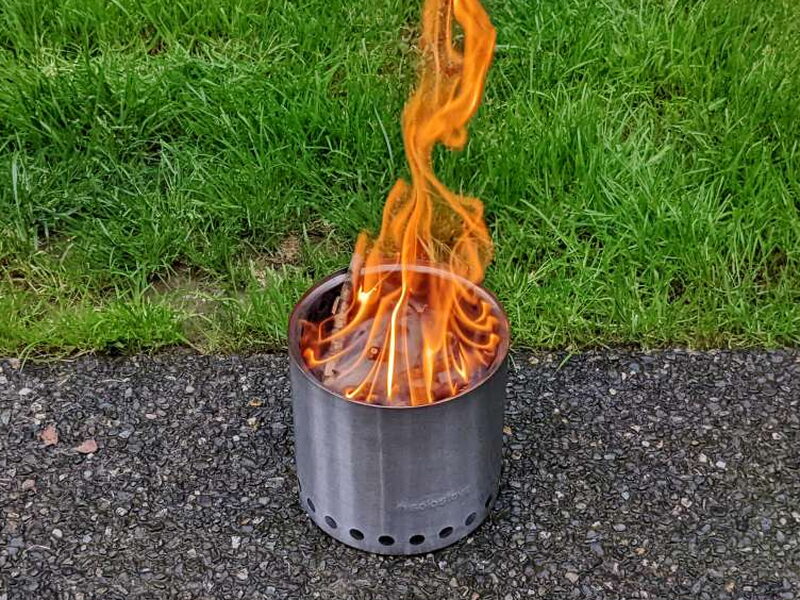
You can actually see the secondary burn working in these shots. The deeper orange flames are shooting straight out of the vent holes in the ring.


Once things were roaring, we set a pot of water on the ring right away. It boiled fast, and despite my doubts about three small tabs holding up a full pot, it never budged.
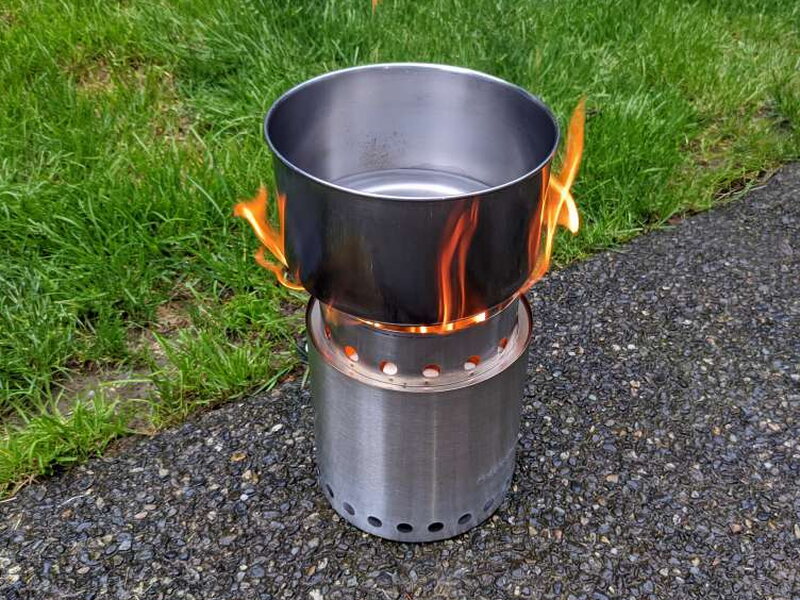
That intensity burns through fuel fast, so the Campfire needs frequent feeding. The cutout in the ring made topping it off easy, even with a pot sitting on top.

All that heat gave the ring and the inside of the body a visible patina in short order.


Burn Time and Cleanup
After feeding it every scrap of twig, pinecone, and leaf we could scrounge, we let the fire burn itself out. The flames died down quickly, though the coals at the bottom took longer to fully cool, about 35 minutes total. If we’d wanted to cook again, tossing fresh fuel onto those coals would have gotten things going again almost instantly.

Solo Stove warns against dousing the fire with water since the metal gets so hot, and once ours had fully cooled, everything had turned to ash except the cores of a few stubborn pine cones.
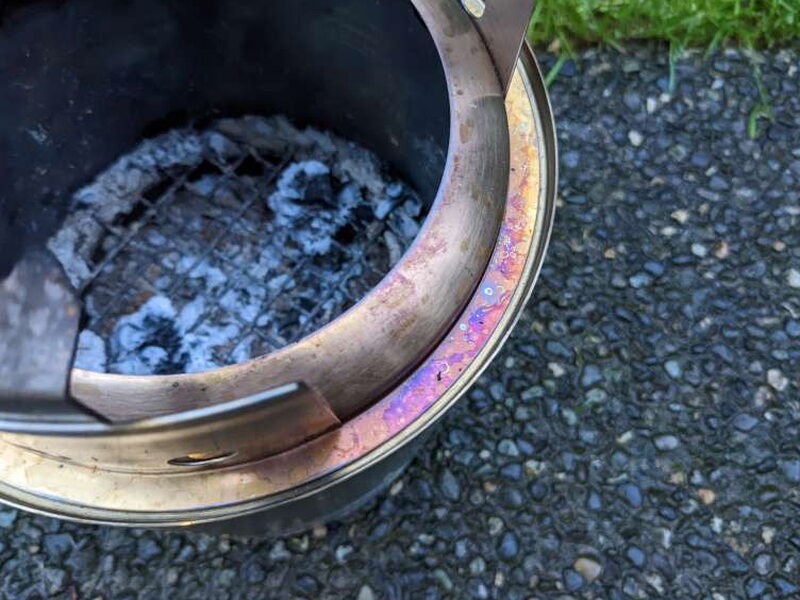
The patina on the ring stuck around after cooling, which doesn’t bother me since I plan on using this thing a lot.

Cleanup itself is easy: tip the stove over once the ashes are fully cool and wipe it down. The one annoyance was a small burnt twig I couldn’t work loose from the mesh, another point in favor of a removable one.
Overall the Campfire performed better than I expected. No fiddly assembly, no fuel canisters to haul, just sticks and pine cones scavenged on site turning into a hot, nearly smokeless fire and a hot meal in no time.

What I Liked
- Starts quickly and burns very hot
- Very low smoke
- Easy cleanup
What Could Be Better
- Form factor might be too big for backpacking
- Expensive
- Depending on the fuel used it might burn dirty
Quick Questions
Q: What fuel does it use?
A: Sticks, twigs, pine cones, and other biomass – no propane or canister fuel needed.
Q: Does the cooking ring come off?
A: Yes, it’s a separate piece that nests inside the body for storage and sits on top during cooking.
Q: Can you refuel it while a pot is on top?
A: Yes, one section of the ring is cut low so you can feed the fire more fuel without lifting the pot off first.
Q: Is the interior mesh grate removable for cleaning?
A: No, it’s fixed in place, which the review notes as a tradeoff – no loose part to lose, but harder to fully clean.
Bottom Line
The Solo Stove Campfire has earned a permanent spot in my camping gear. Given its weight and size, I’m not convinced it’s coming along on long hikes or backpacking trips, but for short overnights and car camping it’s about perfect. It lights fast, burns hot, and cleans up quickly, and I never have to remember to pack fuel since sticks and twigs are usually right there on site. The $104.99 price might give some people pause given how many cheaper camp stoves are out there, but the build quality and clever design make it worth it for me.
Price: $104.99
Product Link: Solo Stove
Source: The sample of this product was provided by Solo Stove.


