
REVIEW – Buying a new car made me a lot more interested in having a witness on the windshield. I wanted a dashcam that could record what happened on the road, keep watch when the car was parked, and avoid looking like a bulky gadget stuck in my line of sight. The Road Angel Halo Pro Dashcam fit that brief with a 2K front camera, a 1080p rear camera, GPS, parking features when hardwired, and a design that almost disappears behind the mirror.
The Halo Pro costs $249 for the front and rear camera package. To use Winter Heating Mode and Parking Mode, you also need the optional 12V hardwiring kit, which adds $32.00. I hardwired my review sample because those parked-car features were a big part of the appeal. The result was a dashcam setup that mostly did what I hoped, although the companion app made the experience rougher than the hardware deserved.
What it is
The Road Angel Halo Pro is a screenless dual dashcam system. The front camera records at 1440p, or 2560 x 1440, while the rear camera records at 1080p, or 1920 x 1080. Internal GPS and a 3-axis accelerometer add speed, position, trip, and impact data to the recordings. Power can come from the included 12V accessory port cable or from the hardwiring kit connected to the car battery.
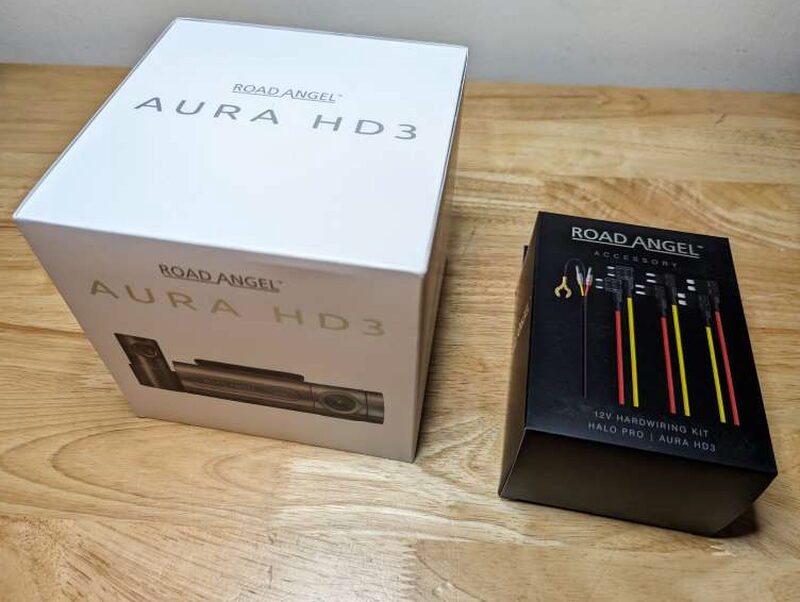
The packaging still carried the Aura HD3 name because the product had recently been rebranded. Inside the main box, the cameras were held in dense foam, and the hardwiring kit shipped separately.
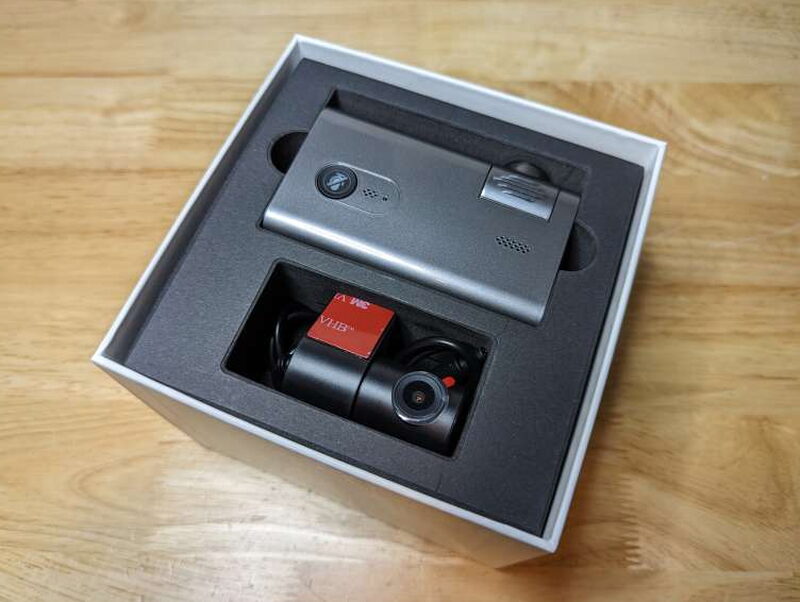
In the box
The Halo Pro Dash Cam box includes the Halo Pro 2K Front Camera, Halo Pro 1080p Rear Camera, 10ft. (3m) 12V DC car accessory port to USB-C power cable, 15ft. (4.5m) rear camera cable, extra 3M adhesive pads, a trim removal tool, and a user manual.

The Halo Pro 12V Hardwiring Kit includes a 10ft. (3m) USB-C power cable, two ATO fuse tap connectors and fuses, two mini fuse tap connectors and fuses, two micro fuse tap connectors and fuses, and an installation manual.

Specs
- Front Camera Resolution: 1440p (2K) / 2560 x 1440
- Front Camera Recording Angle: 140° Wide Angle Recording, f/1.8 Aperture
- Rear Camera Resolution: 1080p / 1920 x 1080
- Rear Camera Recording Angle: 120° Wide Angle Recording, f/2.2 Aperture
- Wi-Fi: 2.4GHZ
- Lens: 6-class Glass Lens
- Processors: Front: HiSilicon Hi3516D Processor. Rear: HiSilicon Hi3518E Processor
- Images Sensors: Front: Omnivision OV4689 CMOS. Rear: Omnivision OV9712 CMOS
- G-Sensor: 3-axis Acceleration Sensor
- GPS: Internal
- App Connectivity: iOS and Android
- Connectivity: USB-C
- SD Card: Supports up to 128GB Class 10 Micro SD Card
- Winter Mode: Available with hardwiring kit
- Parking Mode: Available with hardwiring kit
- Battery Protection: Variable Voltage Battery Cut-Off
- Power Input: 12V USB-C
- Operating Temperature: -20 ~ 70℃
- Weight: 1.5lbs (.681kg)
- Dimensions: 3.5″ x 2.44″ x 1.1″ (9.3 x 6.2 x 2.8cm)

Hardware design
The best thing about the Halo Pro is its physical design. Because there is no screen, the front camera is not a chunky rectangle hanging from the glass. It is a small gray and black plastic wedge with a rotating lens, glossy gray surfaces on the top, front, and bottom, matte black plastic on the sides, and a removable bracket with a large 3M adhesive pad on top.

The rotating lens makes it easier to set the angle after mounting. The small body also helps the dashcam stay hidden behind the rearview mirror, which matters if you do not want to advertise expensive electronics to anyone looking through the windshield.

A rubber cover protects the Micro SD card slot. The Halo Pro supports up to a 128GB Class 10 Micro SD card for videos, photos, and data, but no card is included. I used a SanDisk Ultra 128GB card that cost about $12 on Amazon, and the dashcam formatted it automatically.

Next to the Micro SD card slot is a small factory reset button. The same side has twelve small vent holes, most likely connected to the heating element used by Winter Mode.

The other side continues the ventilation, and the rear of the unit has the power connection area. That is where one of the Halo Pro’s stranger design details appears.

Although the connector is USB-C, the cable is not reversible in the usual way. A small screw on one side of the plug fixes it to the dashcam, and the manual warns that plugging the cable in incorrectly can severely damage the unit.

The included 10ft. power cable plugs into a 12V accessory port and branches near the camera connection to accept the rear camera cable.

The rear camera is a simpler, much smaller unit. It has a rotating lens in a black plastic body, a small 3M adhesive pad, and a short attached cable that connects to the longer extension cable.

That rotating rear lens helps because rear windows are rarely perfectly vertical. You can mount the camera where it fits best, then rotate the lens for a usable view.
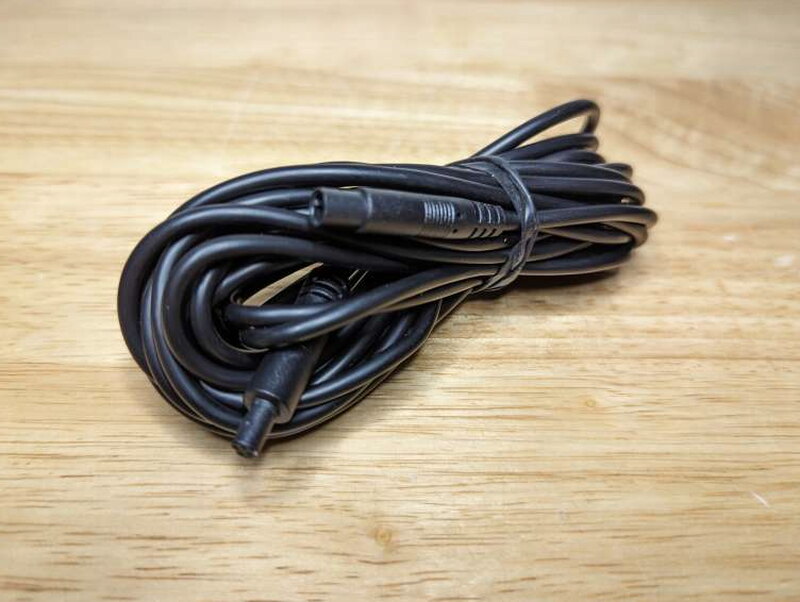
The rear extension cable is roughly 15ft. long, which was enough to run from the front camera to the rear window in my car.

The trim removal tool is basic, but it is useful for tucking the cables into seams around the headliner, dashboard, and interior panels.
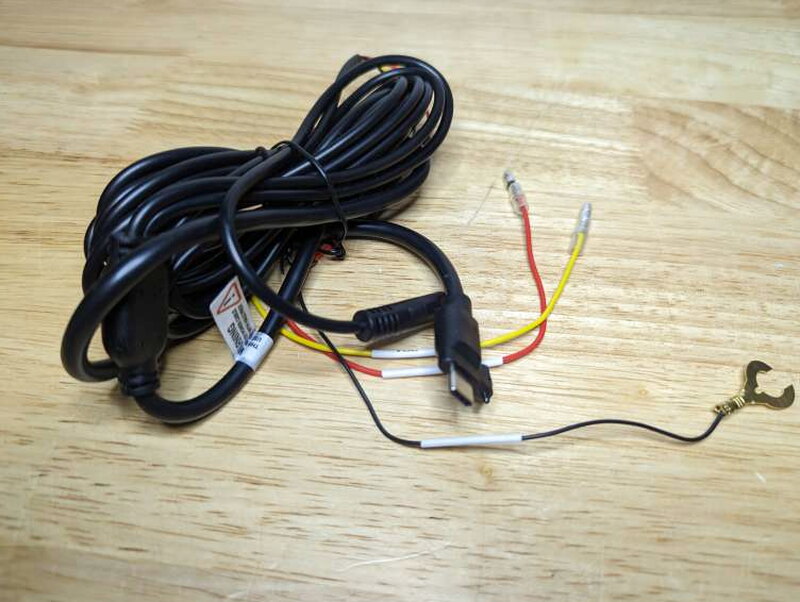
The optional hardwiring cable replaces the 12V accessory plug with three wires. Red connects to a power source controlled by the ignition, yellow connects to an always-on power source, and black connects to ground.

The hardwiring kit also includes ATO, mini, and micro fuse tap options so you can choose the type that fits your vehicle.
Installation and setup
Setup can be quick if you use the included 12V accessory port cable, or more involved if you hardwire it. Either way, the first decision is camera placement. I started with the front camera and looked for a centered, high position with a clear view over the hood.
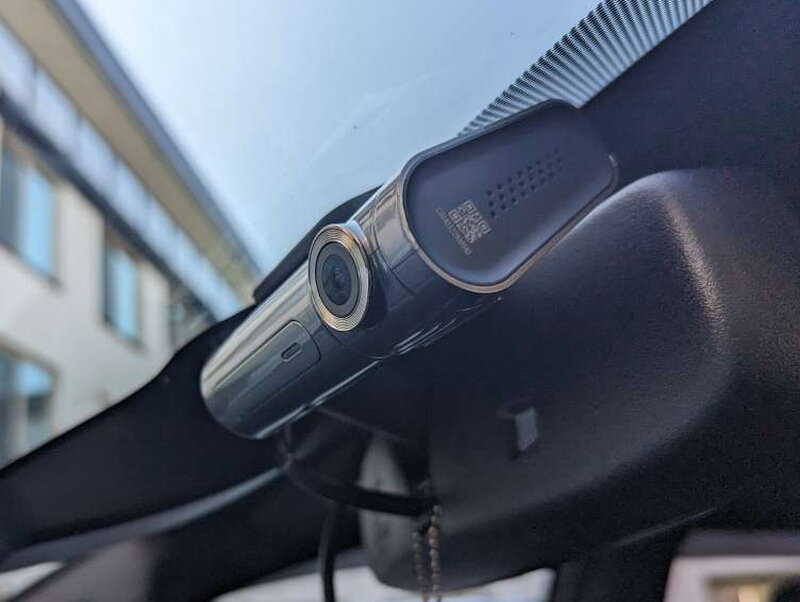
The front camera fits neatly behind the rearview mirror. That placement kept it from blocking my view while still giving the lens a good forward angle.

I mounted the camera high on the windshield, where it could see the road clearly and stay out of my everyday sightline.

The 3M adhesive pad held the lightweight camera firmly once I pressed it into place.

One helpful detail is that the camera slides sideways off the mount. That makes installation easier, and it also means you can remove the camera when you want to make the car less tempting to thieves.

The rear camera is even easier to place because it is so small. Its rotating body made it simple to mount on the rear glass and still aim the lens correctly.

With the cameras connected, the simple approach is to plug the power cable into the car’s 12V accessory port. When the car starts, the dashcam starts.

Because there is no built-in screen, the Road Angel Halo app for iOS and Android is required for viewing footage, changing settings, downloading media, and reviewing GPS or telematics data.

The app also controls Parking Mode timing and battery cutoff settings when the dashcam is hardwired. Those settings matter because a hardwired dashcam can keep drawing from the car battery while the car is off. Unfortunately, I did not find the app intuitive, and even a typo on the Settings screen did not inspire much confidence.

Daily use
Once installed, the Halo Pro recorded sharp video and useful data during my drives. The front and rear cameras did the important camera work well. The weak point was getting to that data through the Halo app. I have used other screenless dashcams, including the Thinkware F200 Dashcam I reviewed back in 2018, and their apps were much easier to live with.
The most frustrating app behavior is that connecting the phone to the Halo Pro over WiFi blocks normal mobile data use. Streaming music in Spotify stopped, and Google Maps stopped updating map data. I do not know why it needs to work that way, but the documentation says that behavior is by design.

When the phone is connected, the app can show plenty of information, including speed, elevation, heading, and current g-force.

The internal GPS can display the car’s position on a map and track trips.

After each trip, the Halo Pro stores the route data as a GPX file. You can review it in the app or download it to a computer and open it in software such as Garmin Basecamp or Google Maps.

The app also assigns a Driving score from 1 to 100 based on acceleration, braking, and cornering data. The score is shown with the route and recorded data, which can be played back for review.
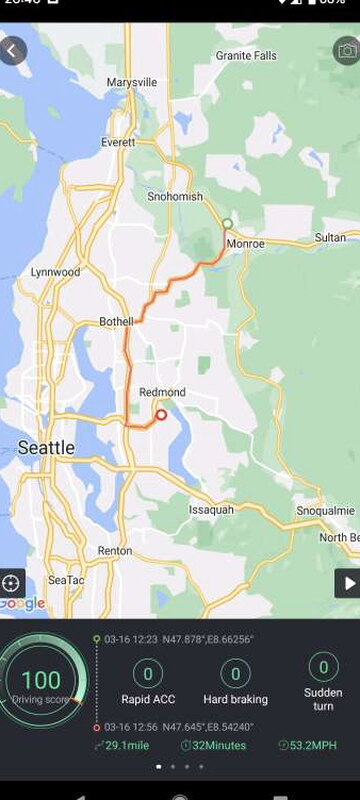
If there is ever a crash, the combination of video, speed, location, and g-force data could be useful for understanding what happened and who was at fault.

One odd extra is the app’s media editing feature, which lets you add filters and adjust clips. I suppose that is handy if you want to make a driving video more social-media friendly, but it felt unnecessary for how I use a dashcam.

Like most dashcams, the Halo Pro records in one-minute looping segments. It keeps saving those clips until the card fills up, then overwrites the oldest footage.
Sample driving video
I recorded several trips with the Halo Pro so the front and rear camera quality could be judged in different lighting and road conditions. I replaced the original audio in the videos so nobody had to listen to me singing along with my driving music.
Country driving during the day from the front camera.
Country driving during the day from the rear camera.
City driving during the day from the front camera.
City driving during the day from the rear camera.
City driving at night from the front camera.
City driving at night from the rear camera.
Highway driving at night from the front camera.
Highway driving at night from the rear camera.

What worked
- Decent quality videos and photos
- Lots of useful data recorded with each trip
- Excellent minimalist form factor
What did not work
- App is buggy and not well designed
- No button to immediately save videos or photos
- Can’t use mobile data on phone when accessing dashcam via app
Quick Questions
Q: Does it have a screen?
A: No, it’s a screenless dashcam – viewing footage, changing settings, and reviewing data all require the companion phone app.
Q: What features need the hardwiring kit?
A: Winter Heating Mode and Parking Mode both require the optional $32 hardwiring kit; the base 12V accessory cable doesn’t support them.
Q: Can you use your phone’s mobile data while connected to the dashcam?
A: No, connecting over WiFi to view footage blocks normal mobile data use on the phone, which the documentation says is intentional.
Q: What resolution do the cameras record at?
A: The front camera records 1440p (2K), the rear camera records 1080p.
Bottom line
The Halo Pro Dashcam met my expectations but did not really exceed them. I like the compact front and rear camera hardware, the video quality is solid, and the GPS and trip data are genuinely useful. I also like that the hardwiring kit is a relatively inexpensive $32.00 add-on that unlocks Winter Heating Mode and Parking Mode without making the total price feel unreasonable.
The companion app is the reason I am not more enthusiastic. It is clumsy, it interrupts normal phone data while connected, and getting to saved clips or settings takes more effort than it should. I also wish the dashcam had a physical button to immediately mark a clip or take a photo. Still, once everything is configured, the Halo Pro can mostly do its job without much app interaction. For a $249 low-profile front and rear dashcam, it gives me the extra peace of mind I wanted for my new car.
Curious how this compares to the competition? I break it down in The Best Dashcams I’ve Tested (So Far).
Price: $249 for the Halo Pro Front and Rear Dash Cam, $32.00 for the Hardwiring Kit
Product Link: Road Angel
Source: The sample of this product was provided by Road Angel.


