
REVIEW – The Makera Carvera Air Desktop CNC Machine is the kind of tool that would have felt unrealistic for my space a few years ago. CNC gear used to mean a garage, a shop, a lot of noise, and even more mess. This machine takes the opposite approach. It is enclosed, compact, and designed for people who want real milling and engraving capability without giving up an entire room.
I tested the Carvera Air 4th Axis Laser Bundle, which adds the rotary fourth axis and laser module to the base desktop CNC. The base machine is $2,499, while the bundle I reviewed is $2,997. That is a serious price, but it buys a mostly assembled, tightly integrated CNC that can handle wood, plastics, acrylic, and light work in non-ferrous metals. There is a learning curve, especially if CNC is new to you, but the results I got from the Air were genuinely impressive.
What it is
The Carvera Air is a desktop CNC milling and engraving machine. In its standard form it is a three-axis mill. With the optional accessories from my bundle, it can also use a fourth axis rotary module and a 5 W laser engraving module.

The first thing to know is that the box is heavy. I moved it myself, which was a mistake. Get help before you lift it.

The packaging is substantial, and the machine arrived well protected.

What is included
- Carvera Air desktop CNC machine
- Optional 4th axis rotary module
- Optional laser engraving module
- Power cable
- Collets and tool kit
- Holding clamps and fixtures
- Safety goggles and laser safety goggles
- Starter set of end mills
- Emergency stop button
- Phone and tablet holder
- USB data cable
- User documentation and quick start guide
- Various project materials
Key specs
- Work area, 3-axis: 11.8 in (30 cm) X by 7.9 in (20 cm) Y by 5.1 in (13 cm) Z
- Work area, 4-axis: 3.6 in (9.2 cm) diameter by 7.9 in (20 cm) length
- Gantry clearance: 4.7 in (12 cm)
- Maximum height with lid open: 33 in (84 cm)
- Footprint: 19.7 in (50 cm) width by 17.7 in (45 cm) depth by 17.7 in (45 cm) height
- Weight: about 66 lbs (30 kg)
- Power supply input: 100 to 120 VAC or 200 to 240 VAC at 50/60 Hz
- Optional laser module: 5 W, 445 nm semiconductor diode laser
- Spindle power: 200 W
- Collet: custom collet with 1/8 in integrated, with optional 1/4 in, 6 mm, and 4 mm collets
- Spindle speed: 0 to 13,000 RPM with closed-loop control
- Runout: less than 0.0003 in (less than 0.01 mm)
- Motor resolution: 0.0002 in (0.005 mm)
- Supported wood: hardwoods, softwoods, MDF, and plywoods
- Supported plastics: foam, PVC, ABS, acrylic, PC, and HDPE
- Supported composites: carbon fiber and FR4
- Supported non-ferrous metals: aluminum, brass, and copper
- Laser engraving materials: wood, plastic, fabric, leather, and cardboard
- Connectivity: USB and Wi-Fi
- Operating systems: iOS, Android, macOS, Windows, and Linux
- Makera CAM software: Makera CAM
- Compatible CAD/CAM software: Fusion 360, SolidWorks, AutoCAD, VCarve Pro, Aspire, and Illustrator

Design and build
The Air makes a strong first impression because it feels like a finished product rather than a kit. It is compact enough for a desk, but at about 66 lbs it has enough mass to feel stable while cutting.

The clear front door gives you access to the bed while helping keep chips, dust, and noise contained during a job.

That LED strip is useful at a glance, and the button above it is used to confirm tool changes.

The interior bed is the heart of the machine. Its threaded holes make it flexible enough for flat stock, fixtures, and the rotary module.

The gantry rides on tracks in the base, and the rubber covers help keep waste material from dropping where it should not go.

The motion system felt smooth in use, and the spindle assembly looks and feels solid.

Once I understood the process, tool changes became one of the nicer parts of the Carvera workflow.

The dust shoe attaches magnetically, which makes it easy to remove when a job or accessory gets in the way.
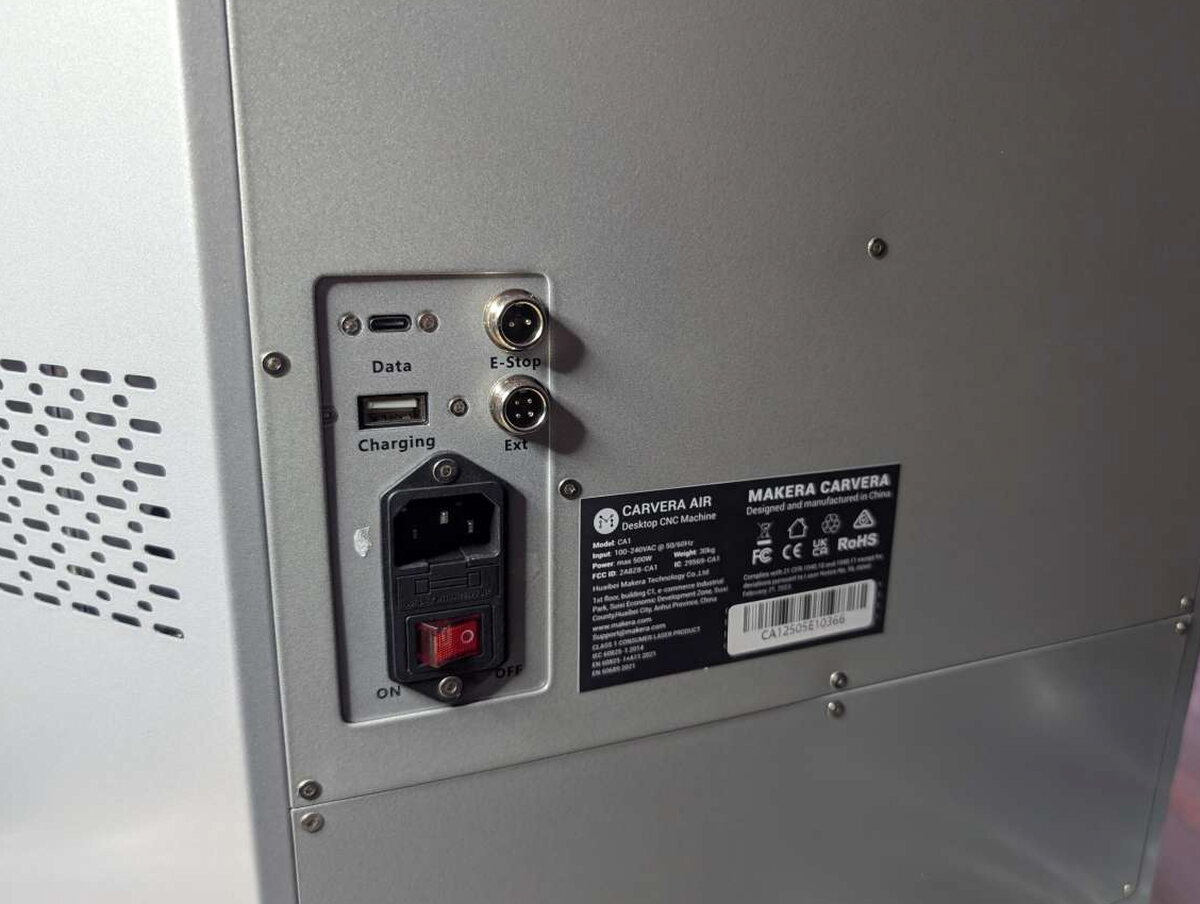
The back of the machine has the main power input and switch, a USB-A charging port, a USB-C data port, and ports for the emergency stop button and extension.

The dust extraction port works very well with a shop vac, although I had to 3D print an adapter for my Dewalt shop vac. The air inlet is there to help keep the spindle cool. At this price, I wish Makera included a small air pump instead of leaving that for the buyer.

Inside, the cables are tidy and protected, which matters in a machine that throws chips around.

The probe sits near the spindle and automatically helps level the machine and measure stock height before jobs.

The laser module mounts to the spindle area like another tool, and the software is supposed to detect it automatically.

The rotary module clamps into the bed and includes knurled chuck wrenches for opening and closing the head.

The tool kit is well stocked enough to get through the included demo projects.

I appreciated that Makera included enough project material to start making things right away.

Setup
The Carvera Air arrives mostly assembled. After getting it onto a solid desk, setup is mostly power, cables, software installation, calibration, and connection to your network.

The most important early check is the internal voltage switch. Make sure it is set correctly before powering the machine.

Installing the phone and tablet holder is simple. Remove two screws, line up the holder, and reinstall the screws.

You only need that holder if you plan to control the Air from a phone or tablet instead of a computer.

For Wi-Fi setup, you connect to the Air’s hotspot first, then point the machine at your home network. After that, running it from the Carvera app on a phone, tablet, or computer is straightforward.

First cuts
Makera includes demo projects and a printed guide, but the guide was not as clear as I hoped. I got much farther by pairing it with Makera’s instructional videos on YouTube.

I began with the LED Light demo, which uses plastic, acrylic, and aluminum to make a small illuminated display.
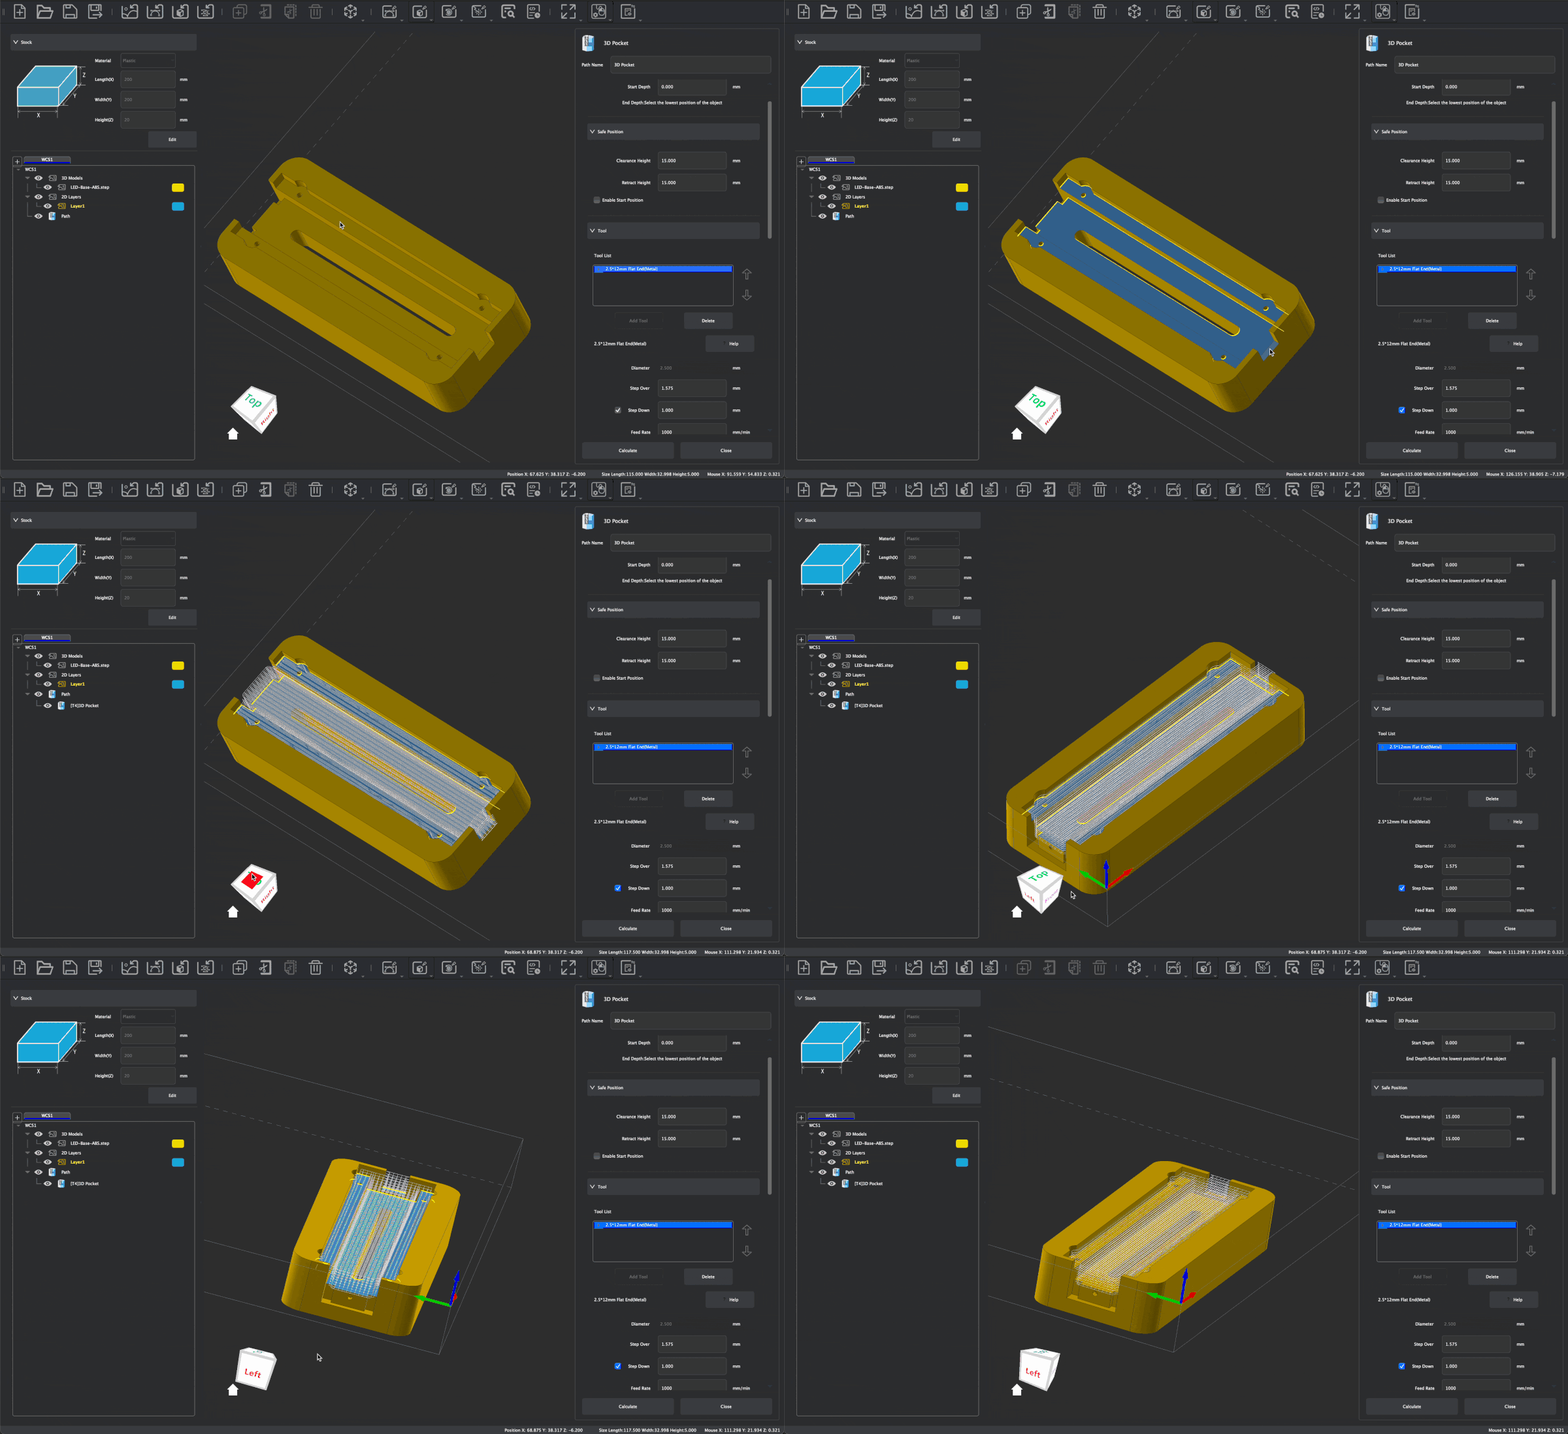
The controller software guides you through materials, tool changes, and imported files, but it still demands patience. A lot is happening, and beginners need to move slowly.

Watching the machine work is satisfying. The enclosure kept the mess contained better than I expected.

The machine itself was easier to live with than I expected. The shop vac was the loud part.

The vacuum setup did its job, but it was not exactly roommate friendly.

The accuracy stood out once the cutting finished. The edges were clean and the fit looked precise.

The next stage engraved an acrylic insert. Makera offers several images for the demo, and I chose Spiderman.
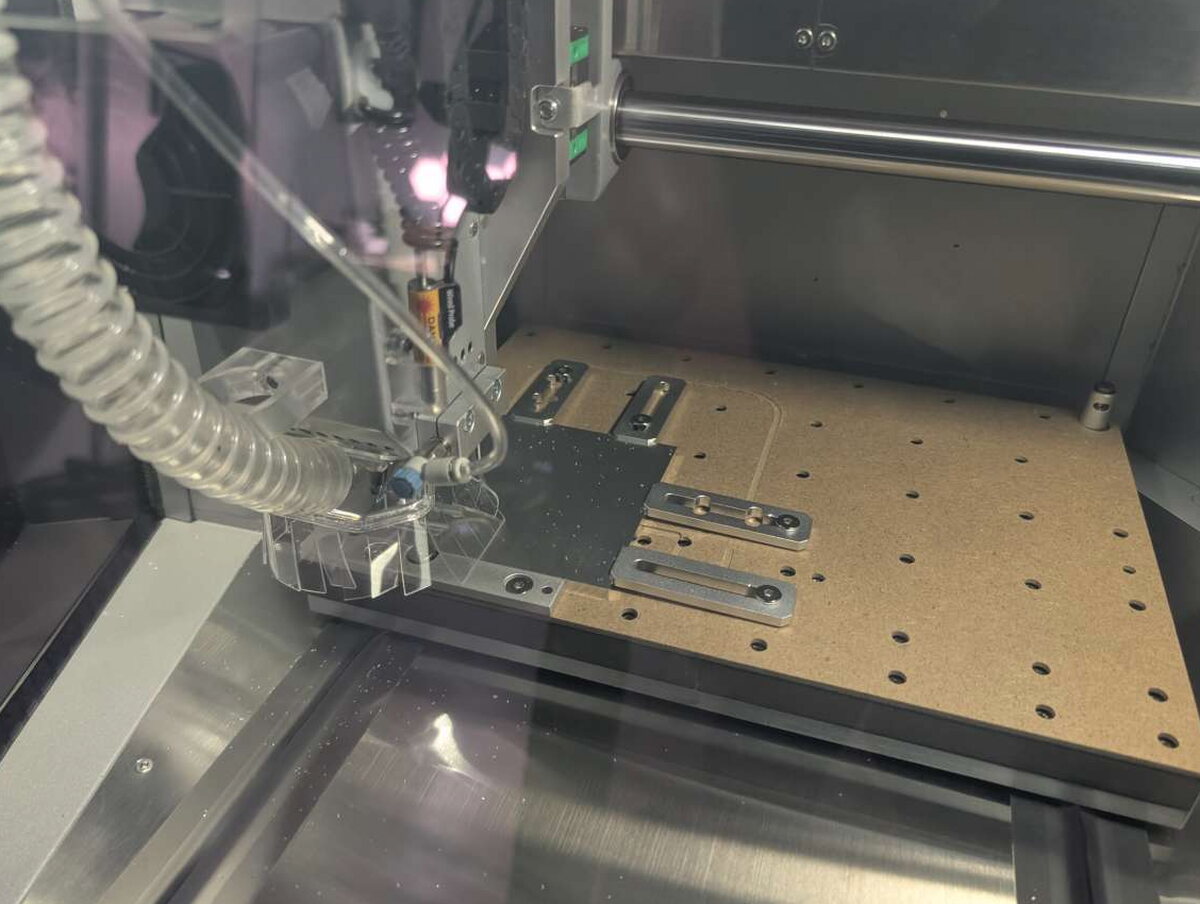
After that came the small aluminum plate. The Air cut through it more confidently than I expected from a desktop machine.

The final LED demo assembly combines the parts cut and engraved by the Air with the included circuit board and lights. Makera sells a version with what you need to make your own PCB boards, but I did not choose that bundle.

Once plugged in, the little Spiderman light earned a spot on my bookshelf.

Laser module trouble
I also tried the laser engraving demo. Unfortunately, no matter what I did, my laser module refused to turn on.

That was disappointing, but it felt like a hardware or connection issue with my unit rather than a problem with the whole machine.

I spent time checking and reseating the connector where the laser module plugs into the control unit.

If the laser had worked, this would also have been the moment where an air pump would help cool the work area during cutting or engraving.

Using the 4th axis
The 4th Axis Relief demo makes a small Nefertiti bust from a wood block. Mechanically, mounting the rotary module is not hard. Pins drop into the base and line up with matching holes under the module.

Once seated, the module needs to be locked down and connected to the machine.

The six mounting screws make the rotary module feel secure.

The connector is tucked inside the rear of the enclosure. Remember to open the dust cap before plugging it in.

The physical installation is manageable, but the instructions could be clearer. I had to watch a few videos before I understood how to adjust the head and grip the material properly.

After the stock is locked in place, the harder part is setting up the program.
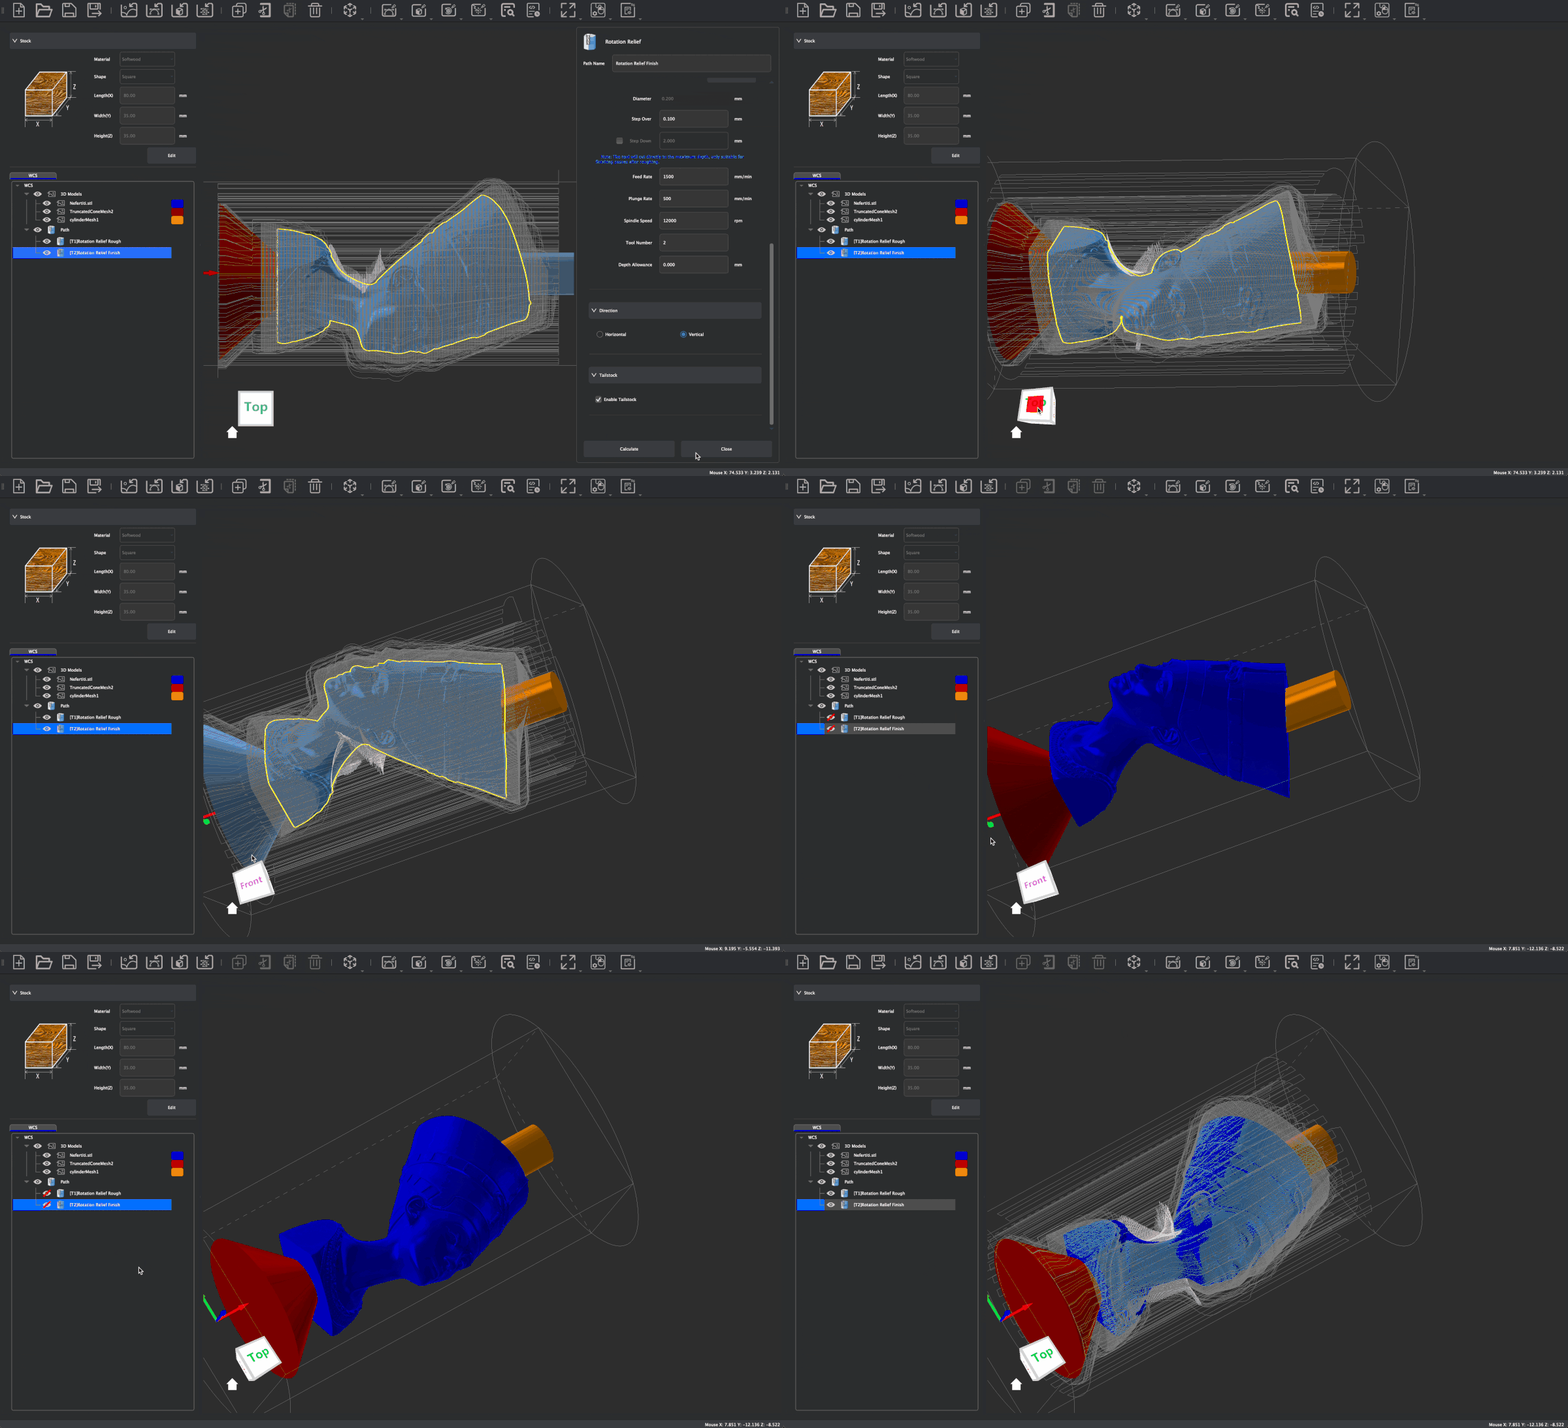
Entering the values for the 4th axis demo reminded me of the LED project setup, only with more parameters I did not fully understand yet. I can run the demo, but creating my own 4th axis jobs will take more practice and trial and error.

Once the program started, the Air began slowly cutting away everything that was not the bust.

This was the messiest demo. The 4th axis blocks use of the dust shoe and vacuum port, so cleanup took more effort.

Even with the mess, watching the bust emerge from the block was the best demonstration of what the Air can do.

The machine captured curves and detail nicely as the stock rotated on the fourth axis.

After brushing off the finished piece, I was impressed by the edges, curves, and fine details.

Beyond the demos, I experimented with hardwood and a small aluminum plate. Both turned out well, although aluminum required slower feeds and careful attention to the tool paths. I am still learning, but the software previews and tool-changing process made it easier to build confidence.

Final thoughts
The Makera Carvera Air Desktop CNC Machine packs real capability into a small, enclosed footprint. It can mill wood, plastics, acrylic, and light non-ferrous metals, and the optional 4th axis opens up projects that would not be possible on a basic three-axis desktop machine. The build quality is strong, the enclosure is practical, and the integrated workflow makes the machine less intimidating once you get some experience.
It is not effortless, though. New CNC users should expect a real learning curve, and Makera’s printed instructions could be clearer. My laser module also failed to activate during testing, although Makera support was quick to offer a replacement after I contacted them. I still think an air pump should be included at this price.
Even with those complaints, the Carvera Air impressed me. At $2,499 for the base model and $2,997 for the Carvera Air 4th Axis Laser Bundle I reviewed, it is an investment. For hobbyists and small-space makers who want precise CNC capability without building a full shop, it is a fantastic option.
The Good
- Compact enclosed design works well in small spaces
- Solid build quality
- Almost no assembly required
- Clean results in wood, acrylic, plastic, and aluminum
- Useful dust collection when the dust shoe can be installed
Quick Questions
Q: What materials can the Carvera Air cut?
A: Wood, plastics, acrylic, composites like carbon fiber, and light non-ferrous metals such as aluminum, brass, and copper.
Q: Does it come fully assembled?
A: Mostly, it arrives largely assembled; setup is mainly power, cables, software, calibration, and network connection.
Q: What issue did the reviewer hit with the laser module?
A: It never activated during testing despite reseating the connector; Makera support offered a replacement after being contacted.
Q: Is an air pump included for cooling?
A: No, that’s flagged as a real gap at this price; the machine has an air inlet for spindle cooling but no pump included.
The Not So Good
- Learning curve for new CNC users
- Laser module failed to activate during testing
- Airflow system should be included at this price
- Printed demo instructions could be clearer
Price: $2,499 Base, $2997 Carvera Air 4th Axis Laser Bundle as reviewed
Product Link: Makera
Source: The sample of this product was provided for free by Makera. Makera did not have a final say on the review and did not preview the review before it was published.


