
REVIEW – My office setup changed dramatically when I moved from an old IKEA desk wedged into a corner of my apartment living room to a dedicated room in my new home. Once I started planning that space, the desk became the piece everything else had to work around. I wanted a large surface, motorized height adjustment, a design that fit the room, and enough stability that standing would feel natural during a full workday.
That search led me to the Flexispot E2Q Standard 4-Leg Standing Desk. The four-leg frame, generous configuration options, and sit-stand range were the big draws. My configured setup came to $709.99, which felt reasonable for the amount of desk I was getting. Assembly took more patience than expected and the included cable management is the weakest part of the package, but the desk itself has become one of the best upgrades in my home office. I may have made the commute to my actual office a little harder to justify, so please do not tell my boss.
Why I Picked This Desk
The E2Q is built around a dual-motor, two-stage, four-leg frame that adjusts from 28.7″ to 48.4″ high. It supports up to 330 pounds, which is plenty for a desktop, several monitors, a laptop, and the usual mess of office gear. Flexispot also offers the desk in multiple sizes, finishes, and frame colors, so it can be tailored to different rooms instead of forcing one standard look.

Delivery is a workout before the build even starts. The desk arrived in three plain, heavy boxes: one for the desktop and two for the metal frame, legs, and related parts.

Included Parts
- Desktop, dark bamboo as configured here
- GloTouch Keypad
- Dual motor 2-stage 4-leg frame
- Main control unit
- Frame hardware
- Wire management net
- Allen wrenches
- User manual
Key Specifications
- Max Speed: 1”/s (25mm/s)
- Frame: 2-Stage
- Motors: Dual-motor
- Adjustable Height: 28.7″-48.4″
- Adjustable Frame Width: 39″-61.8″
- Applicable Desktop Sizes: 47.2″-78.7″ (L) x 32″-35.4″ (W)
- Desktop Size for review: 71” x 35″
- Maximum Static Load: 330lbs (150kg)
- Product Weight: 78.5 lbs (35.61 kg)

How It Looks in the Room
The Flexispot E2Q has a clean, modern shape that can blend into a simple workspace or a more traditional office. I chose the 71” x 35″ dark bamboo desktop with a black frame because that combination best matched the room and gave me the large surface I wanted.

The bamboo finish looks great in person. It also seems prone to scratching, so a desk mat is on my short list for keeping the surface looking fresh over time.

The main reason I went with the E2Q instead of a common two-leg standing desk was stability. I move between sitting and standing several times a day, and I tend to lean on the surface while standing, so wobble was a deal breaker.

The height range runs from 28.7″ to 48.4″, and the four-leg design keeps the desk steady even at the tallest setting. That steadiness is the feature I appreciate most every day.

The control panel includes a small display, up and down buttons, four programmable preset buttons, and a memory button. I especially like that the “1” looks like a standing person and the “2” looks like a seated person, because that makes the saved positions easy to remember. The USB charging port is a useful extra.

The steel legs and frame are available in white or black. I picked black to match the rest of my setup, and the frame feels reassuringly solid once everything is tightened down.

Another pleasant surprise came after assembly: without touching the adjustable feet, the desk sat level both front to back and side to side.

The Assembly Reality
Putting the E2Q together was doable, although some steps were more confusing than they needed to be. A cordless screwdriver helped a lot. The frame pieces were straightforward, while the instructions became vague when it was time to position the frame on the desktop.

The basic process starts with building the leg assemblies and attaching them to the main frame sections.

The two motors mount diagonally from each other, which helps the lift system raise the large desktop evenly.
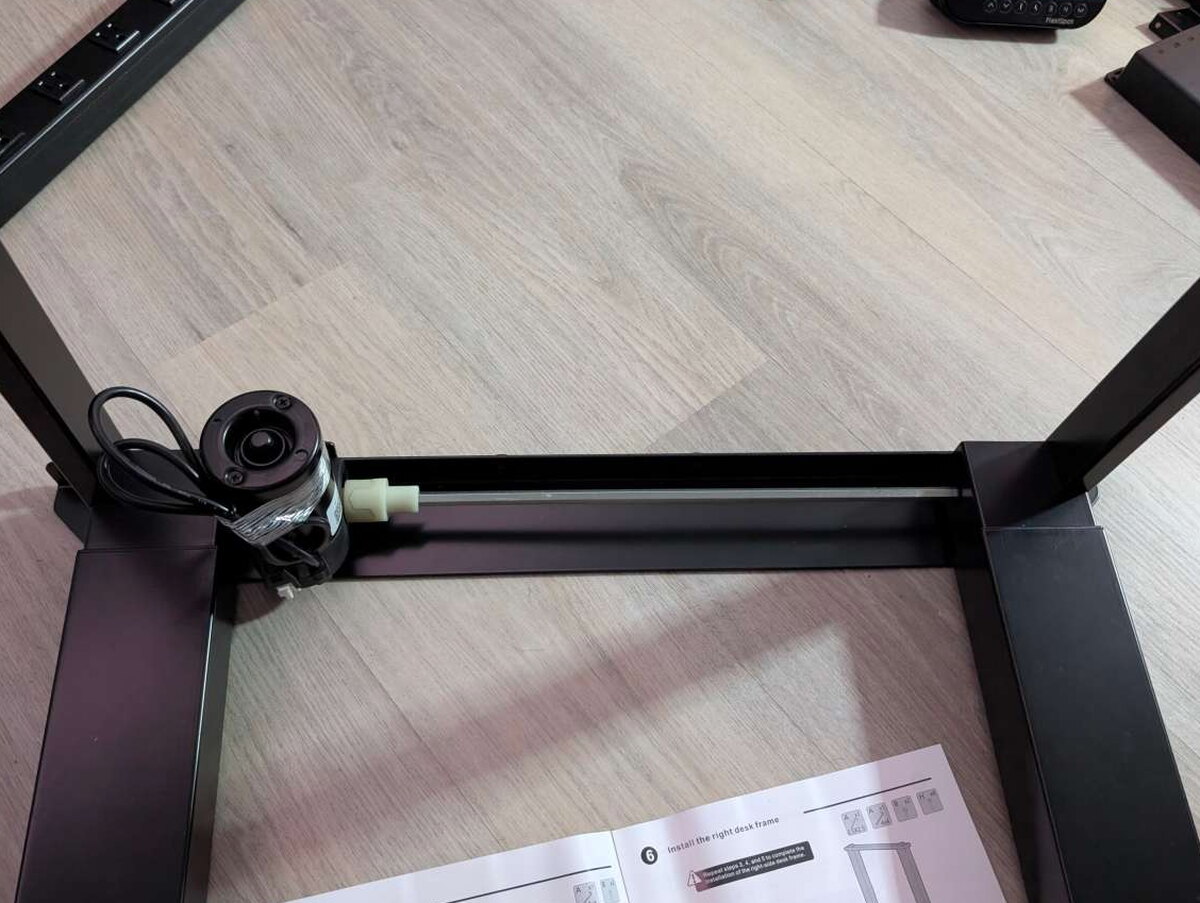
Those motors connect to the lift system through two long transmission rods that run along the underside of the frame.

Once the feet are attached to each leg, the frame starts to look like a full desk base.

The confusing part was the hole pattern. The pre-drilled holes on the underside of my desktop did not line up with every hole in the frame, which made me think I had missed a step.

After some head scratching, I realized the desk supports several desktop sizes, so the pre-drilled holes are not a perfect guide for every configuration.

The width adjustment happens through two floating bars that slide inside the frame rails. They let the frame expand or contract to match the selected desktop.

Once the legs were spaced correctly, I made sure the frame stayed within Flexispot’s recommended length range.

The bars include markings that show the extension limits, which helped confirm I was still within the intended range.

After centering the frame on the desktop, I tightened the floating bars with two set screws at each end.

The sheet metal guards over the transmission rods also required careful positioning. I initially tried to match them to the pre-drilled holes, then realized they needed to be spaced manually. That meant measuring a few times before fastening them symmetrically.

The control panel was easier. Its pre-drilled holes lined up, and it can be installed on either the left or right side of the desktop.

The main control unit needs to be placed where the motor wires can reach it cleanly.
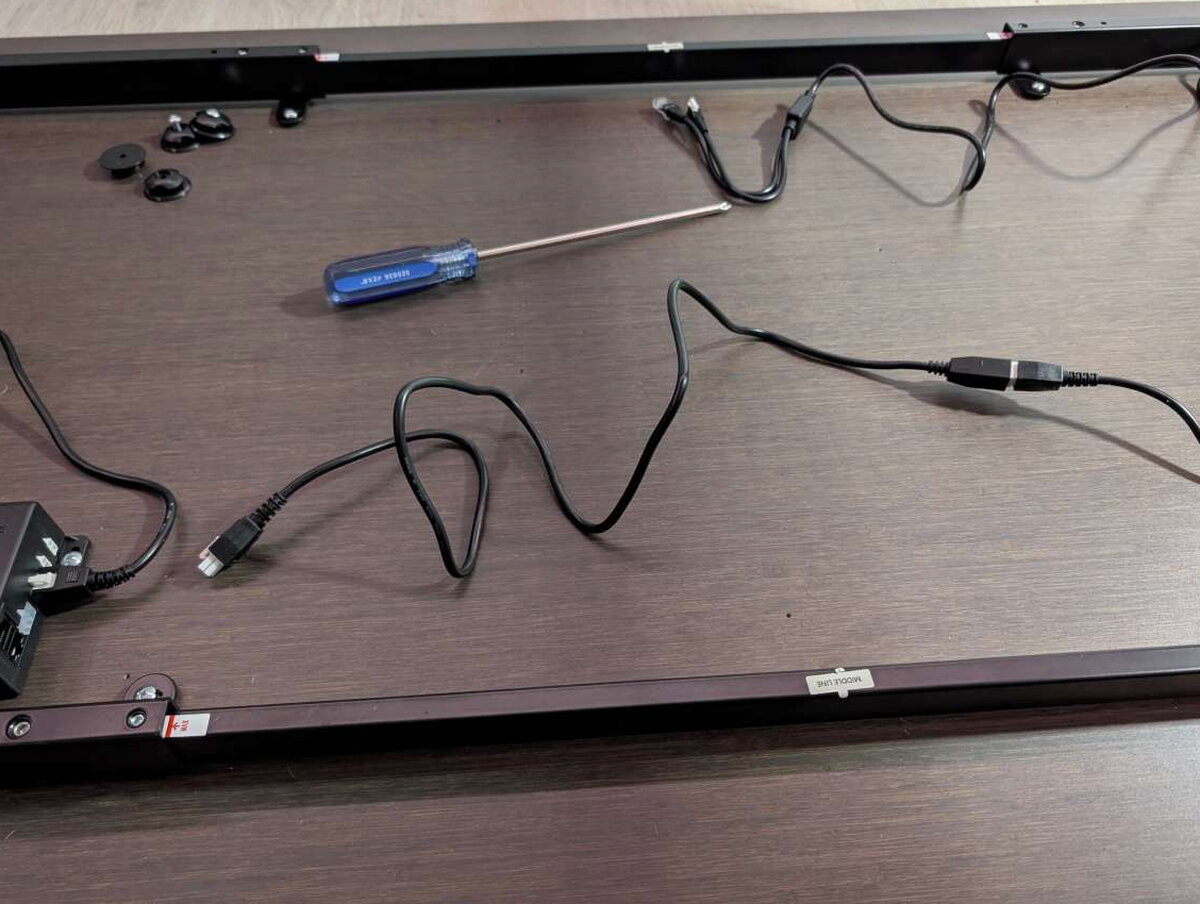
Because I ordered a longer desktop, Flexispot included an extension cable for the motor farthest from the control unit.

The control unit has ports for both motors, the control panel, and the power cord.

Flexispot includes four adhesive-backed cable ties. I used them to organize the wiring that runs to the control unit.

Those ties did a good job keeping the desk’s wiring tucked up under the surface and away from the mess of computer cables that would come later.

The included cable management system is a large fabric net with six elastic loops. The loops hook onto knobs that are screwed into the desktop. It works, although the fabric can sag once cables are loaded into it, and that is hard to judge before drilling the mounting knobs into place.

Daily Use
Once assembled, the Flexispot E2Q quickly became the center of my workspace. The wide desktop gives me room for multiple monitors, a laptop, peripherals, and still enough open space that the office feels cleaner than it did with my old cramped desk.

Height changes are simple: press a button and let the dual motors do the work. The motor noise is quiet enough that it has not been a distraction during calls or meetings.

I have two memory heights programmed, one for sitting and one for standing. The four-leg design continues to feel like the right choice because the desk does not wobble when I lean on it. I still need to improve the computer cable situation, and the bamboo top deserves a protective mat, but those are fixable issues around a desk I enjoy using every day.
What Worked Well
- Very sturdy once assembled correctly
- Affordable for amount of included features
- Lots of options for size, material, and color
What Could Be Better
- Poor assembly instructions
- Included cable management system not very effective
- Bamboo desktop prone to scratches
Quick Questions
Q: How much weight can the Flexispot E2Q support?
A: Up to 330 lbs of static load.
Q: How many memory height presets does it have?
A: Four programmable preset buttons plus a memory button on the control panel.
Q: Is the included cable management good?
A: Not particularly, that’s a real complaint; the fabric net sags once cables are loaded into it.
Q: What’s the height adjustment range?
A: 28.7 inches to 48.4 inches.
Bottom Line
The Flexispot E2Q Standard 4-Leg Standing Desk made my home office feel like a proper workspace. The 71” x 35″ dark bamboo desktop gives me the room I wanted, the black steel frame looks clean, and the four-leg design provides the stability I hoped for when sitting, standing, and leaning on the desk throughout the day. The assembly instructions need work, the fabric cable net is underwhelming, and the bamboo surface should be protected from scratches. Even with those complaints, the E2Q delivers a lot for $709.99 as configured. If you want a big, stable, adjustable desk with plenty of ways to customize the look, this one is easy to recommend.
Price: $709.99 as configured
Product Link: Flexispot
Source: The sample of this product was provided for free by Flexispot.
Flexispot did not have a final say on the review and did not preview the review before it was published.


