
REVIEW – The Elegoo Centauri Carbon started out as the printer I expected to like only with reservations. Elegoo positions it as beginner friendly, and that phrase can sometimes mean a machine with fewer controls, fewer features, and print quality that is merely good enough. After living with it, I came away with a very different take. This enclosed Core-XY printer has become one of the machines I reach for first, whether I am running a quick throwaway test or a longer print with fussier filament.
At $299.99 for pre-order, the Centauri Carbon is not interesting just because it is affordable. It is interesting because it combines speed, a rigid aluminum enclosure, automatic bed leveling, a built-in camera, a filament cutter, air filtration, and network printing in a package that did not feel stripped down during daily use.
Quick take
The Centauri Carbon is a fully enclosed 3D printer with a 256 x 256 x 256 mm build volume and claimed print speeds up to 500 mm/s. It uses a Core-XY motion system, a hardened steel dual-gear extruder, a 0.4 mm nozzle that can reach 300℃, and a heated bed rated up to 110℃. Connectivity is through USB or WiFi, and the workflow is built around Elegoo software based on Orca Slicer.
The short version is simple. The print quality impressed me, the frame feels unusually solid for the price, and the network printing workflow is genuinely convenient. My complaints are also real. The fans are loud, the top glass needs a better storage or hinge solution, the printer should sit on a sturdy table, and my review unit arrived with shipping damage that made setup more frustrating than it should have been.


In the box
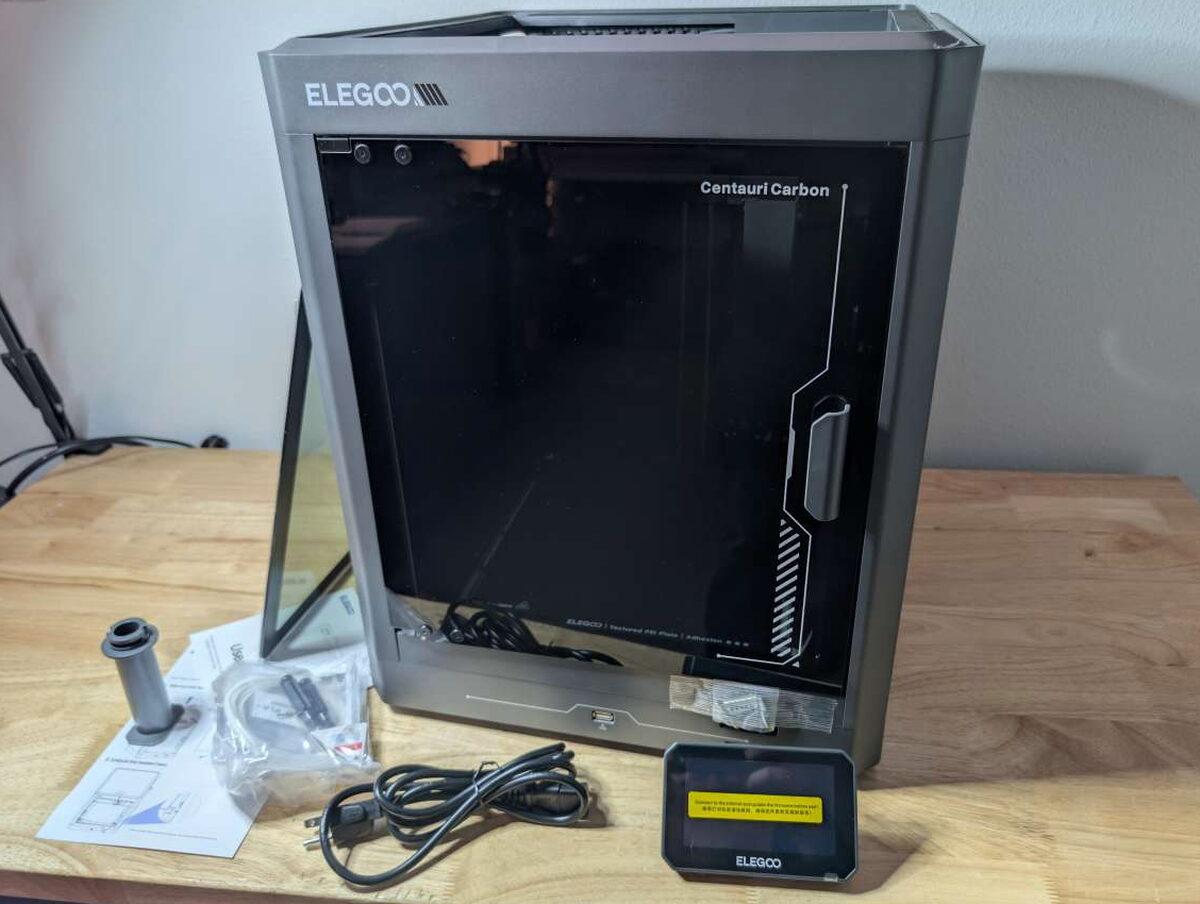
Elegoo includes the Centauri Carbon printer, the top glass panel, a user manual, the filament spool holder, a power cord, the touch screen, and the tools and supplies needed to get started. The accessory kit includes screwdrivers, Allen wrenches, a scrape blade, a USB stick, a filament tube tool, an extra silicone nozzle cleaner, printing bed adhesive, lubricant, and test PLA filament.
Specs that matter
- Power: 1100W@220V / 350W@110V
- Voltage: 100-240V / 50/60HZ
- Build volume: 256mm x 256mm x 256mm (10.08 x 10.08 x 10.08 in)
- Printing platform size: 260mm x 262mm (10.24 x 10.31 in)
- Printing speed: ≤500mm/s
- Acceleration: up to 20,000mm/s²
- Net weight: 17.5KG (38.58 lbs)
- Gross weight: 21KG (46.30 lbs)
- Product size: 398 x 404 x 490mm (15.67 x 15.91 x 19.29 in)
- Package size: 475 x 480 x 560mm (18.70 x 18.90 x 22.05 in)
- Screen: 4.3-inch full-color capacitive touch screen
- Motherboard: dual-core with 8GB RAM
- Nozzle: single 0.4mm nozzle
- Printing accuracy: ±0.1mm
- Layer thickness: 0.1-0.4mm
- Extruder type: hardened steel dual-gear extruder
- Reduction ratio: 5.2
- Supported materials: PLA, PETG, TPU, ABS, and carbon fiber filaments
- Filament diameter: 1.75mm
- Leveling method: 4-strain gauge automatic leveling across 36 points
- Connectivity: USB and WiFi
- Slicing software: Orca Slicer
- Supported file formats: STL and OBJ
- Printing file format: Gcode
- Ambient temperature: 5-40℃
- Maximum heated bed temperature: 110℃
- Maximum nozzle temperature: 300℃
- Special features: filament cutter and waste bin, overhead light, air filtration, and semi-automatic belt tensioner
Build and layout
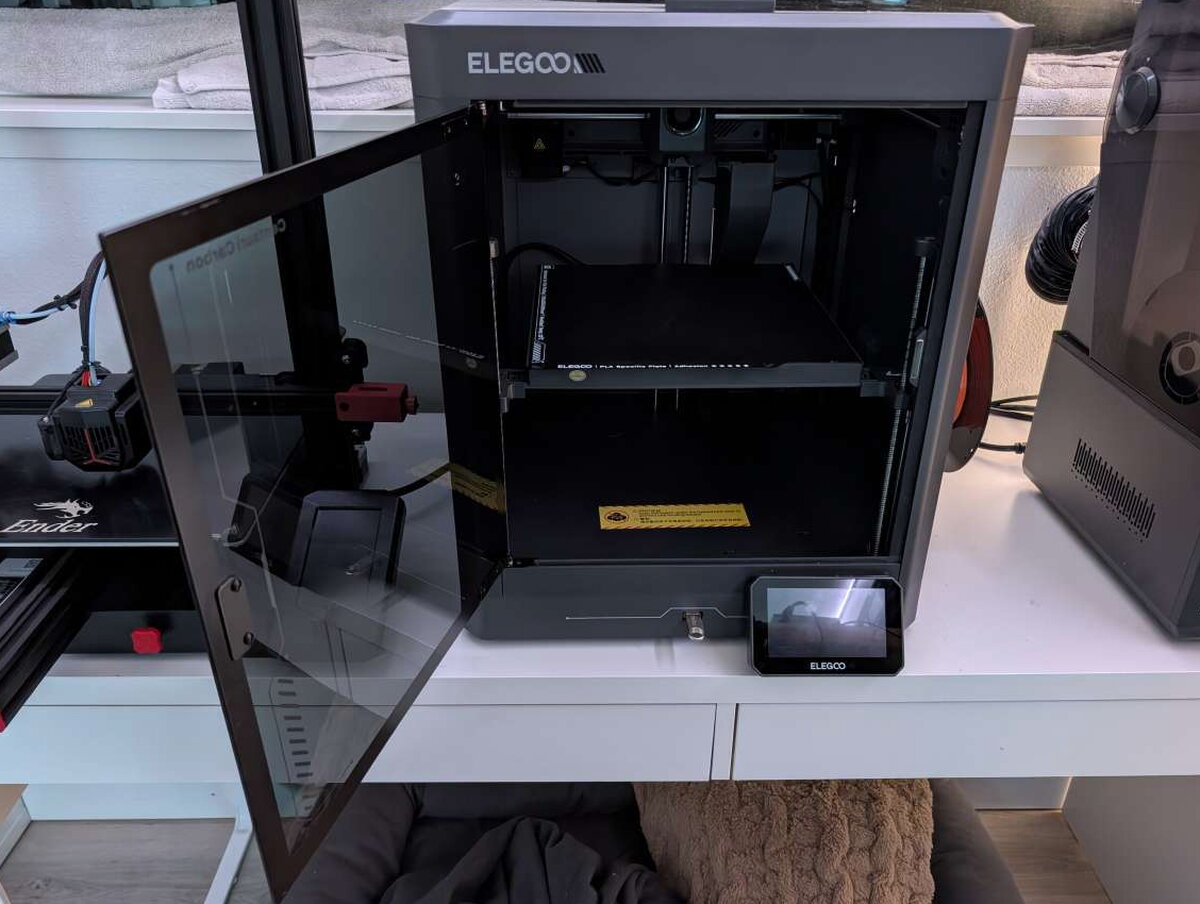
The first surprise was how substantial the Centauri Carbon feels. The chassis is mostly aluminum, the seams line up cleanly, and the side panels are held with Allen bolts. Calling it a beginner printer does not do the hardware justice. It feels like a compact industrial box rather than a budget machine.


The top and front panels are dark glass. The front is hinged, while the top lifts off completely. Elegoo recommends removing the top when printing PLA, which I do often, but then you need somewhere safe to put the glass. A hinged top or a storage slot on the side or back would make daily use easier.

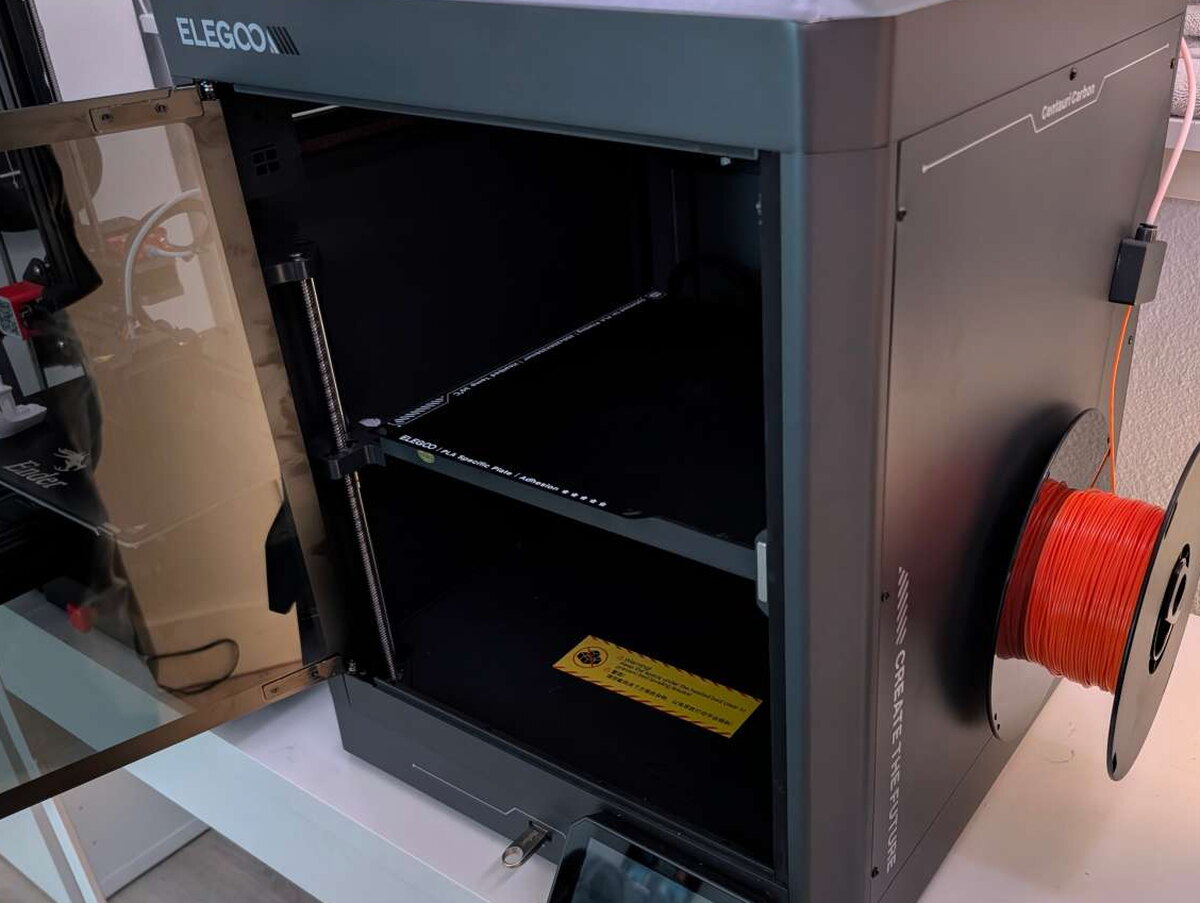
Inside, the build plate rides on three threaded Z-axis rods. The print head handles the X and Y movement, which is the Core-XY arrangement that lets this printer move quickly while keeping the bed movement focused on height. The chamber is insulated, which helps with temperature stability when printing materials that benefit from an enclosure.

The 256 x 256 x 256mm build area is smaller than my Creality Ender 3 Max Neo, which I reviewed in October 2022, so this is not my choice for oversized prints. For most everyday models, parts, and test prints, the volume is plenty.
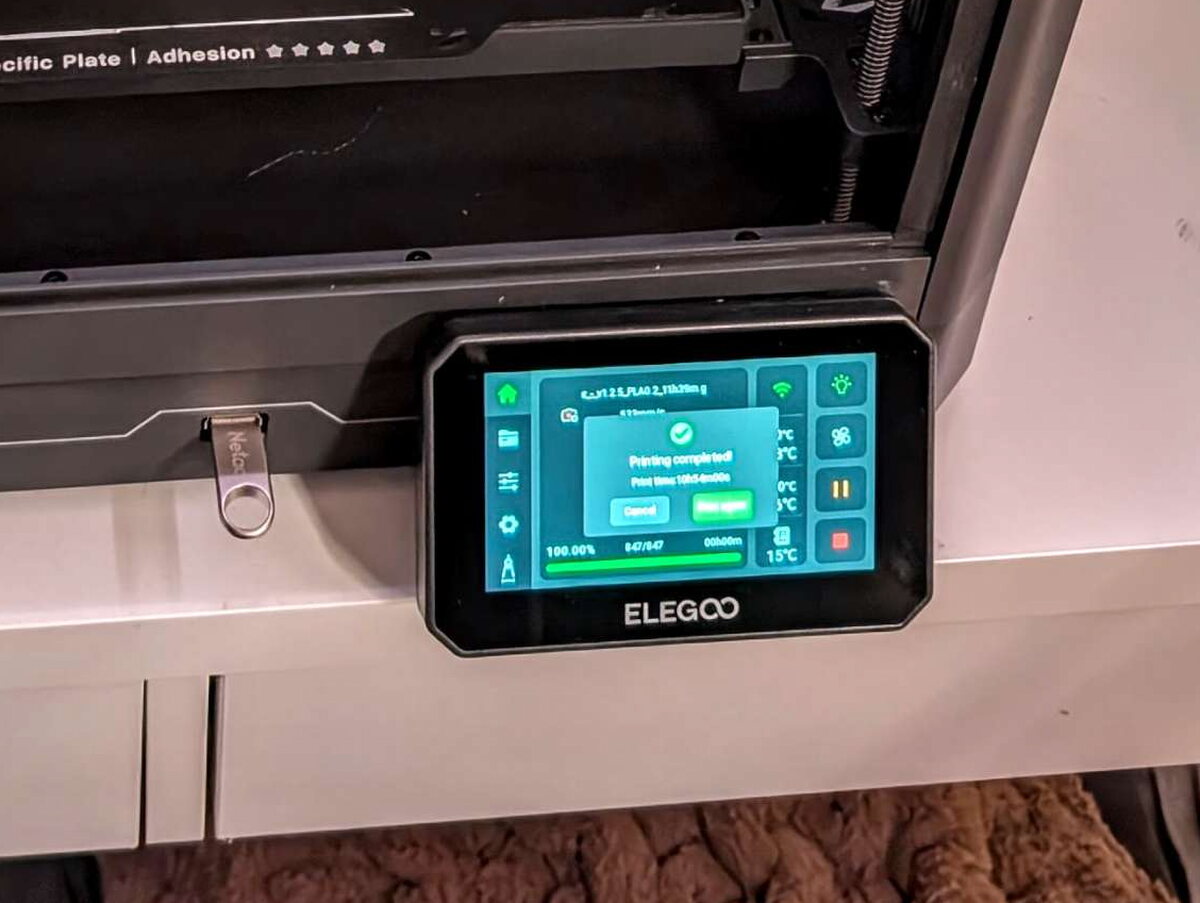
The 4.3-inch capacitive touch screen is bright and easy to navigate, and a USB port sits nearby for the included removable drive. I still prefer physical buttons and knobs on machines like this, but the screen itself works well.
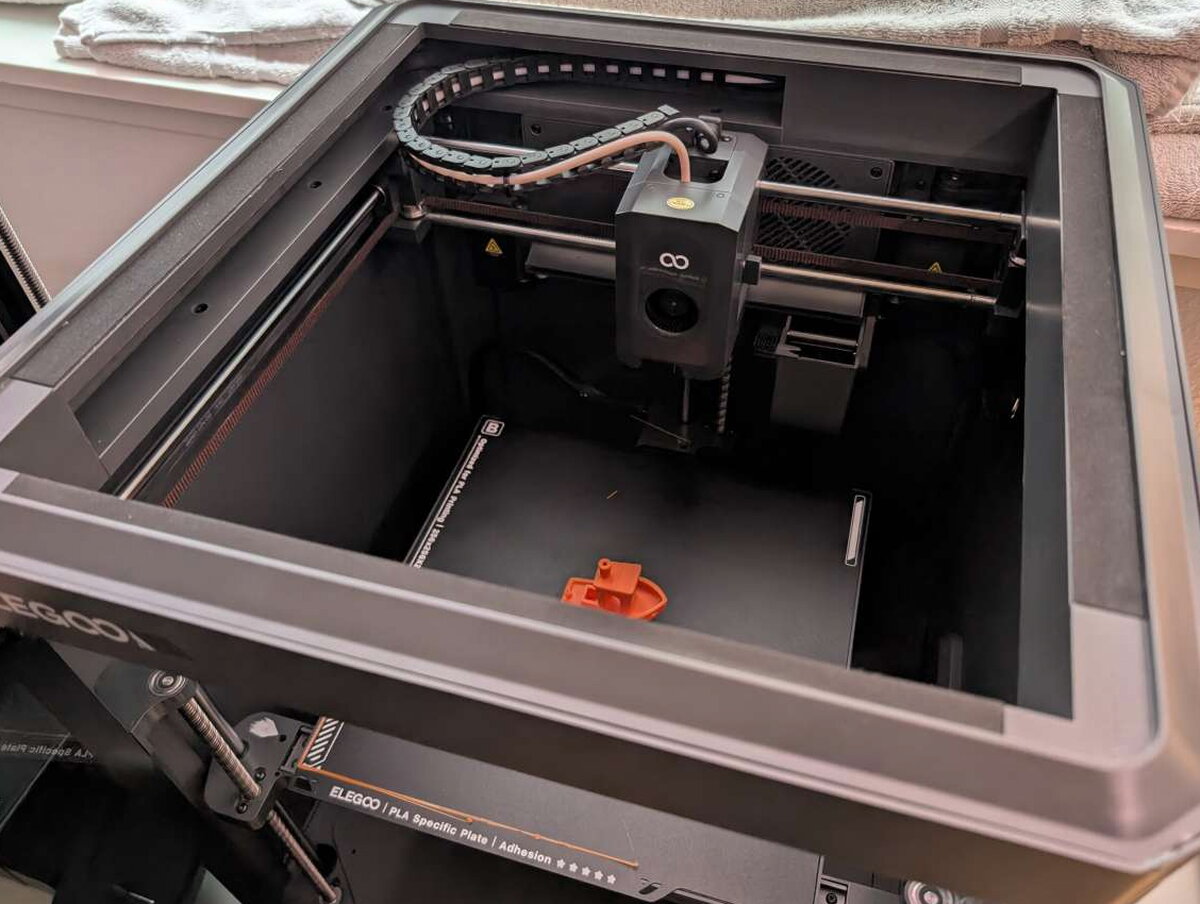

The flexible, magnetic, dual-sided textured PEI plate is one of my favorite parts of the machine. Finished prints release easily, cleanup is minimal, and the plate helps keep the first layers consistent.

Before a print starts, the Centauri Carbon lays down two long test strips to confirm filament flow. It is a small step, but I liked having that extra warning before a job really began.

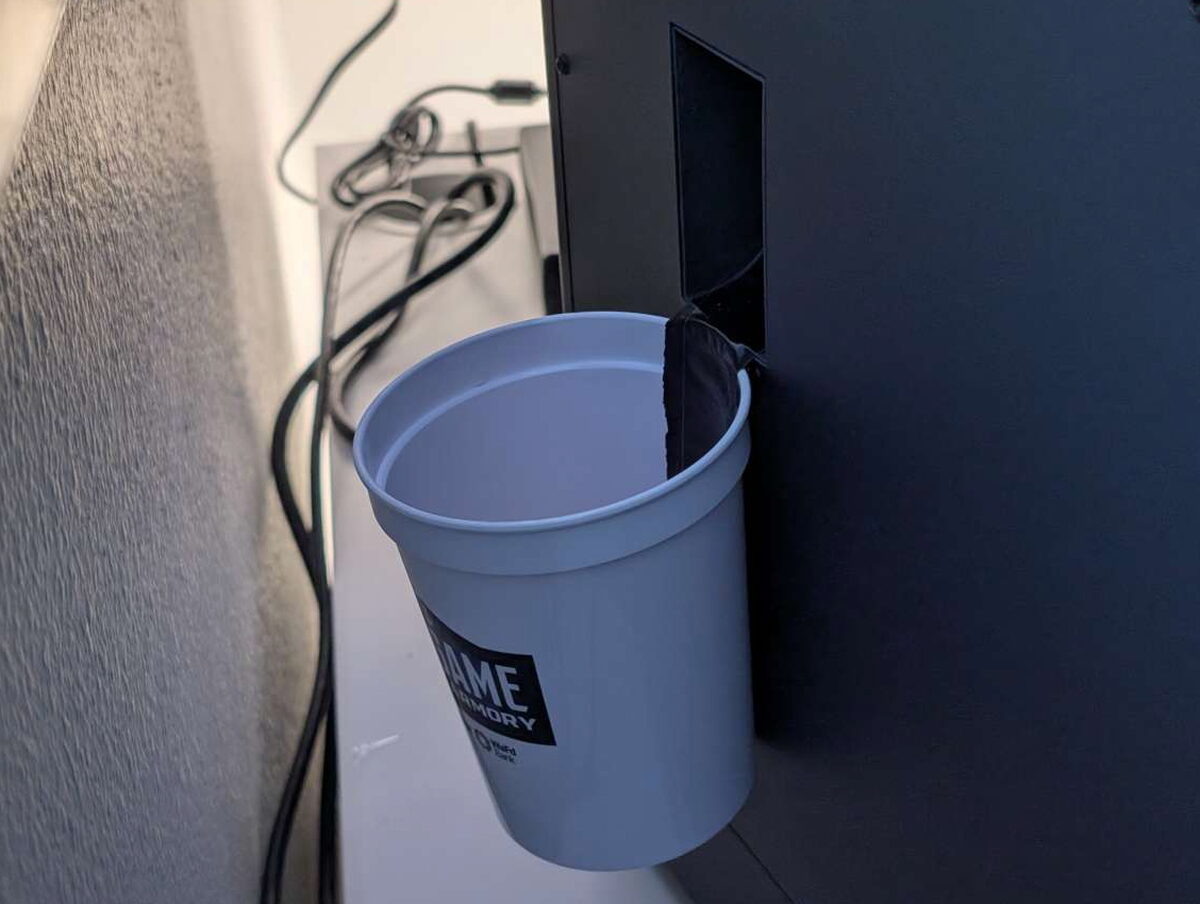
A silicone brush wipes the nozzle before use, and waste drops through the chute. Elegoo includes a model on the USB stick for a small waste bin that mounts to the back, although I used a simpler collection cup during testing.

The power switch and power port are on the back. I would rather have the switch on the front, especially since the machine is enclosed and likely to sit against a wall or near other gear.

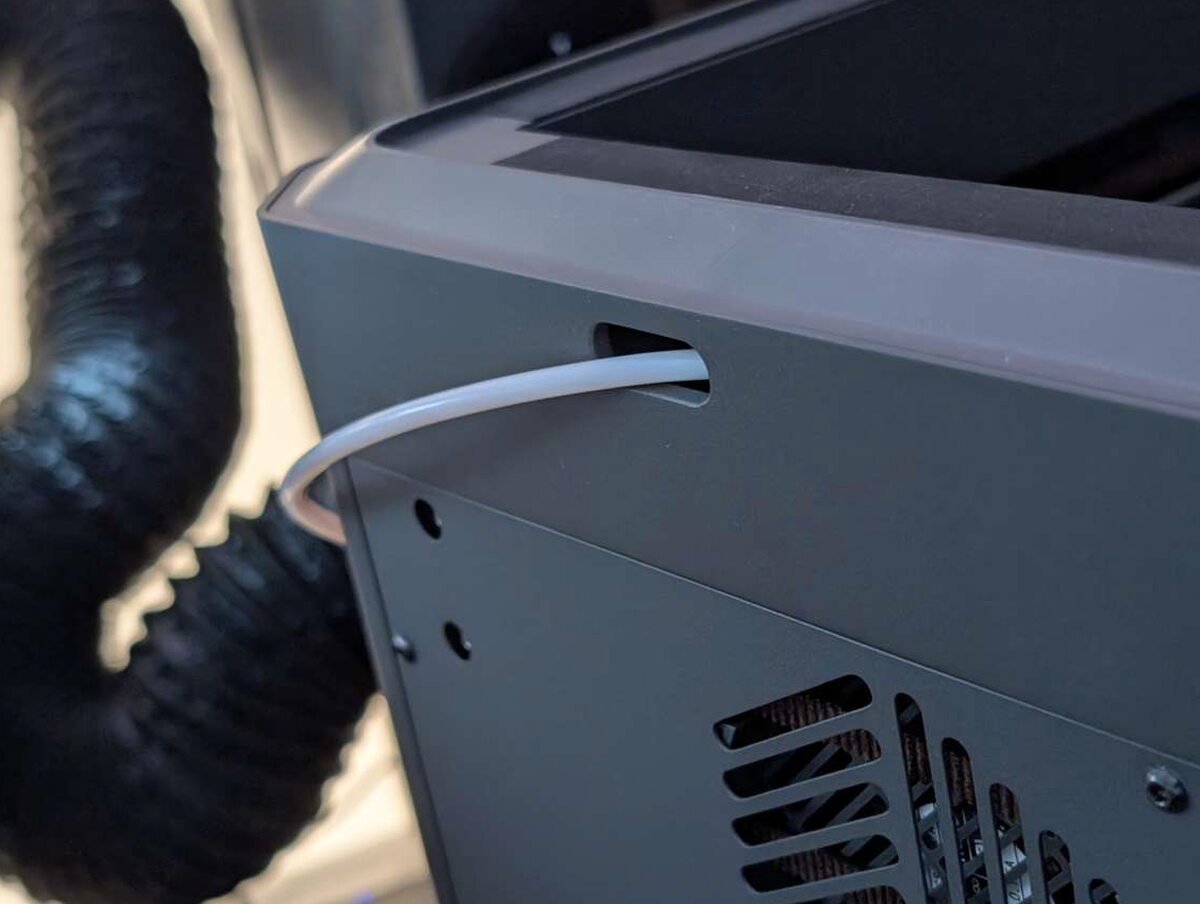

The filament path exits the top rear and curves around to the side-mounted holder. The holder is positioned well and handled the spool types I tried without drama.

A filament run-out sensor sits above the holder and can trigger an alarm and pause when filament is running low. Inside, the semi-automatic belt tensioner keeps belt tension in check to reduce vibration while printing.
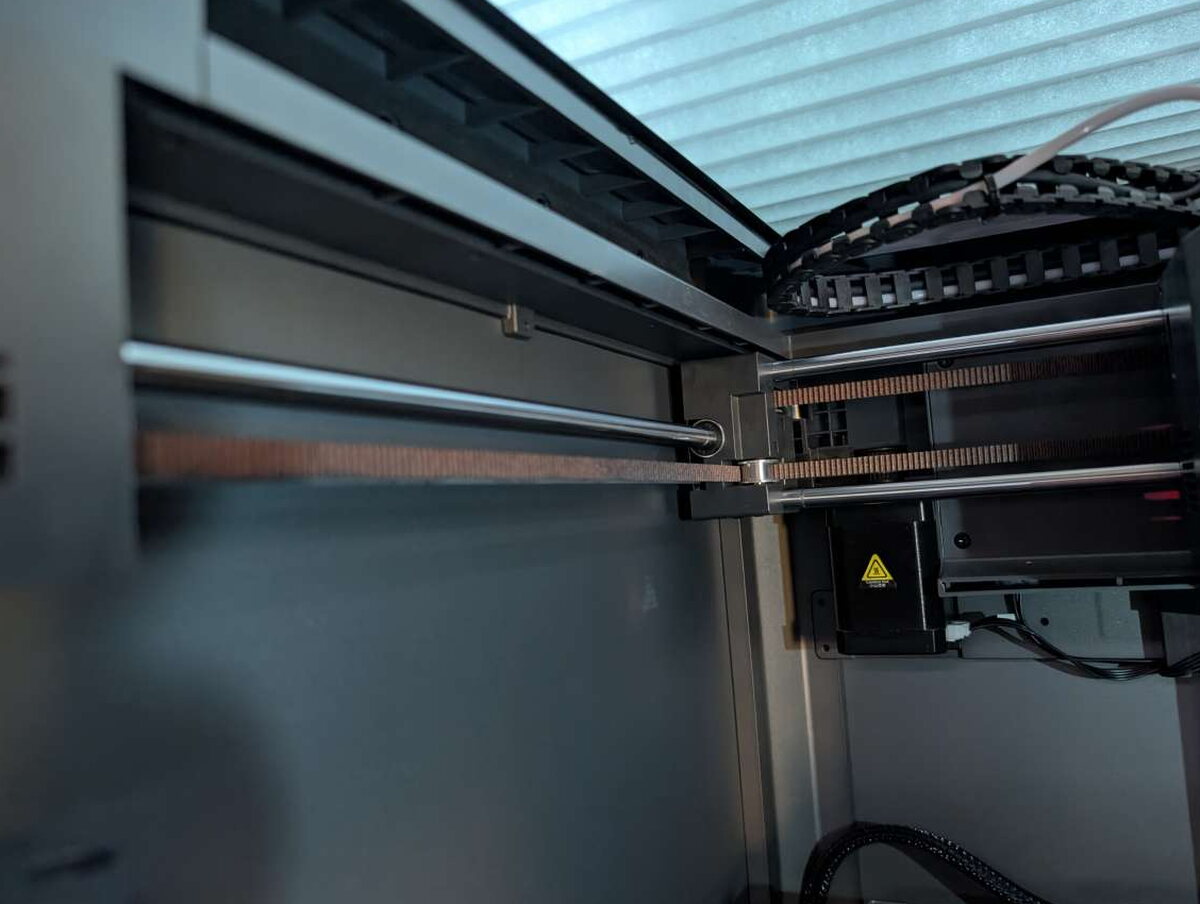

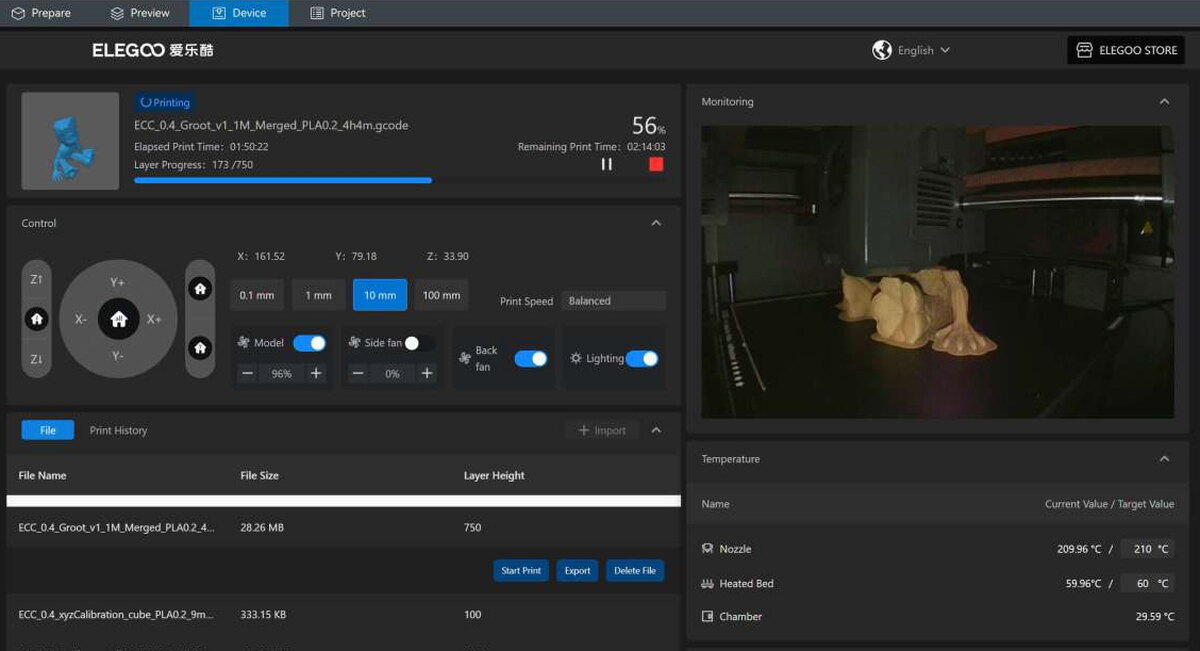
The built-in chamber camera lets you watch prints in real time and can be enabled for time-lapse videos when a print begins. I still had a few failed prints turn into filament nests before I caught them, but the camera and overhead LEDs make monitoring much easier.


The filament tube on the print head pops off quickly for jam clearing. The extruder also has an integrated filament cutter that can cut and retract filament automatically. The hot end reaches 300℃, which opens the door to materials beyond basic PLA, including carbon fiber, marble, and wood composite filaments.

Speed is a major part of the Centauri Carbon pitch. Many slower printers live around 30 to 50 mm/s, faster machines often run in the 60 to 90 mm/s range, and very quick consumer models can push past 100 or even 200 mm/s. The Centauri Carbon can reach up to 500 mm/s. That is excellent, but it still depends on temperature, settings, and filament. If those are not dialed in, quality can suffer.
Setup experience
Elegoo says the Centauri Carbon arrives pre-assembled and ready to print, and that is mostly accurate. There are still a few tasks before the first job.


First, three shipping screws need to come out of the build plate. Red markers make them easy to spot, and the included Allen wrench handles the job.


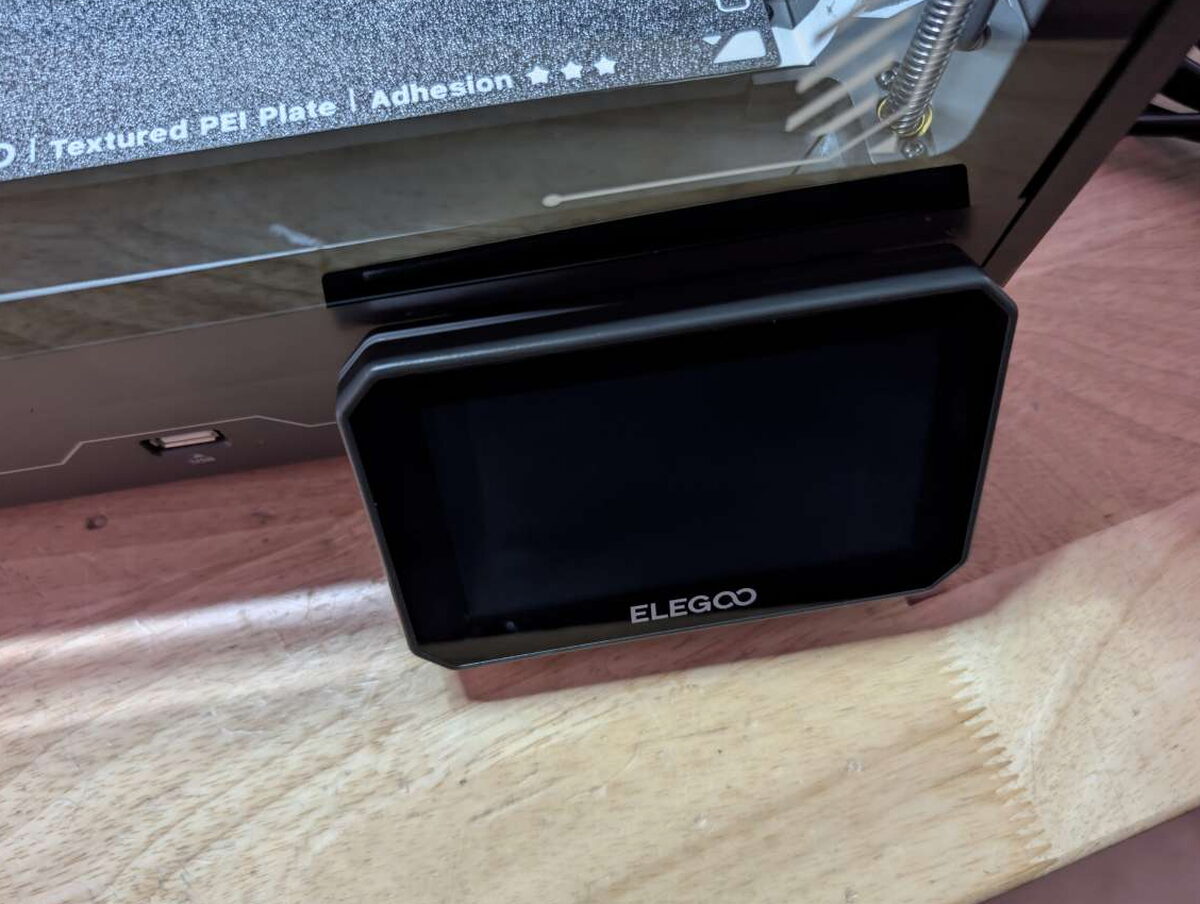
Next, the touch screen attaches to the front. Line up the ribbon cable correctly, press the connector into place, and then snap the screen down onto the front tabs.

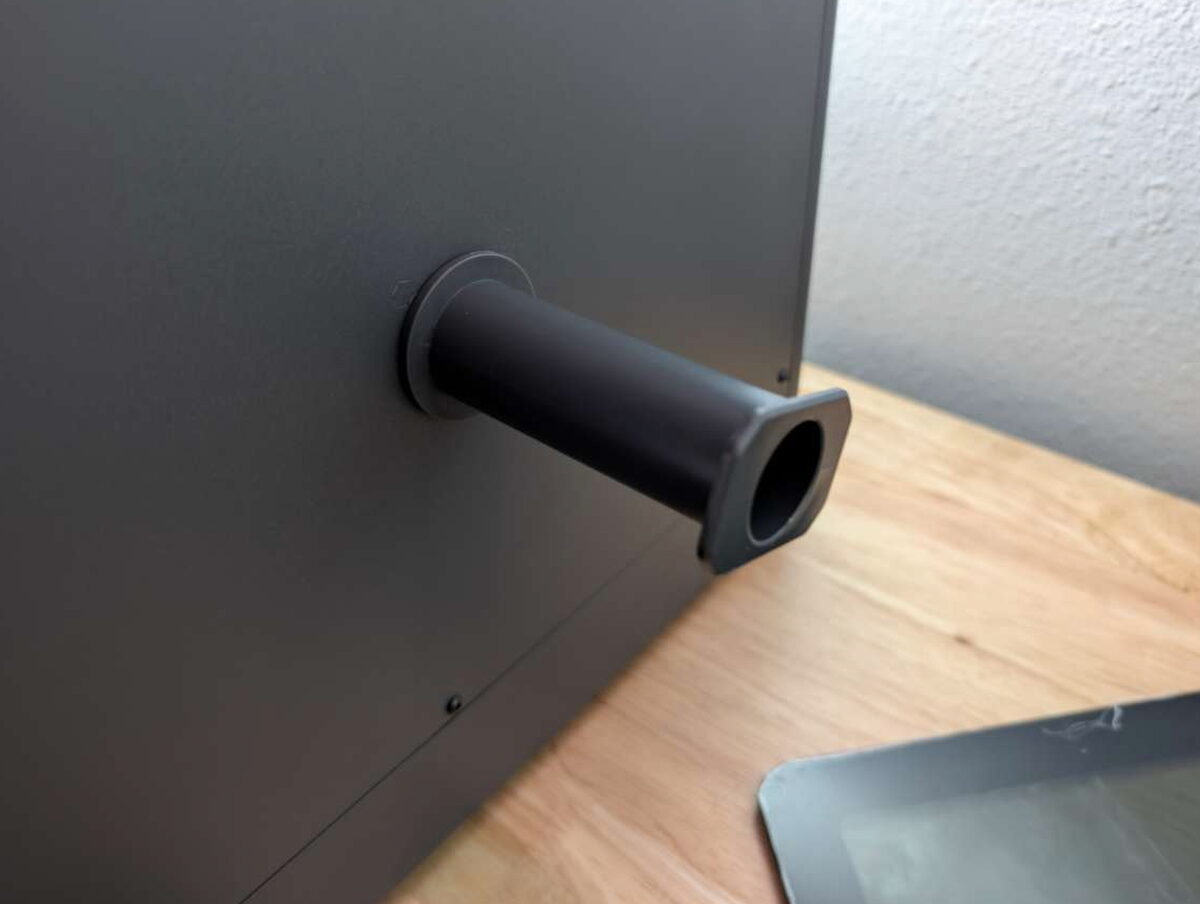
The last physical step is installing the filament holder. It slides into the side slot and locks in by twisting the tabs.

My sample had one big setup problem. The glass door would not open at first, and the top glass panel would not sit correctly in the frame. After some investigation and plenty of frustration, I found that the frame had been bent badly during shipping, even though the box looked fine.
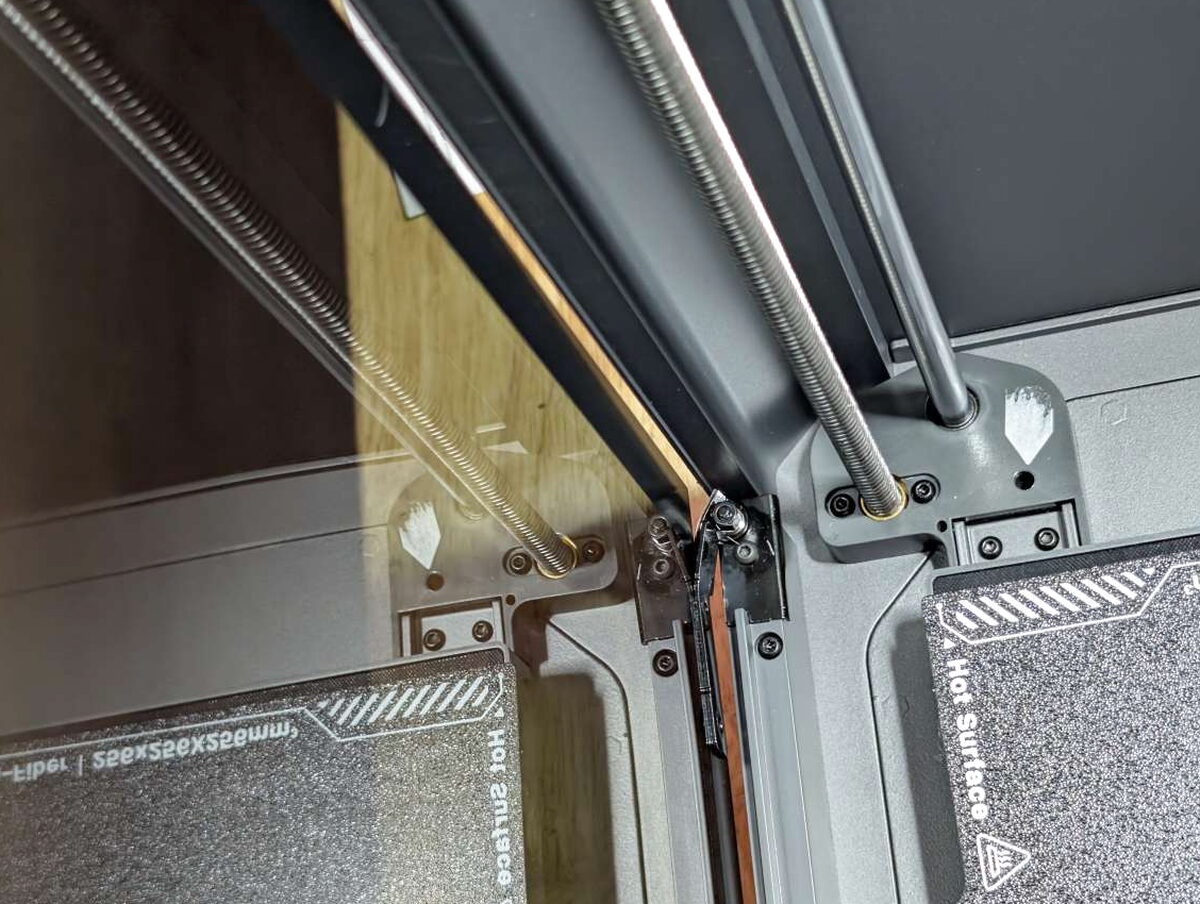

Fixing the bent door hinge took about 30 minutes because it was roughly 25 degrees away from flat. Once fixed, the door closed properly. The frame remained about 1/4 inch off center, so the top panel never seated perfectly in its grooves. I am treating this as shipping damage, but I hope it is not a quality control issue.
Printing results

Once running, the Centauri Carbon produced some excellent prints. It also had a few ordinary 3D printing failures. Some prints failed to stick to the build plate and wasted filament. A few turned into the familiar bird-nest mess before I noticed. Even with those failures, the overall experience was far better than I expected.


The printer did especially well on complex, longer prints and on trickier materials such as Transparent PLA and Wood PLA. My Baby Groot Wood PLA test, which I use across printers, came out beautifully with minimal stringing or warping.


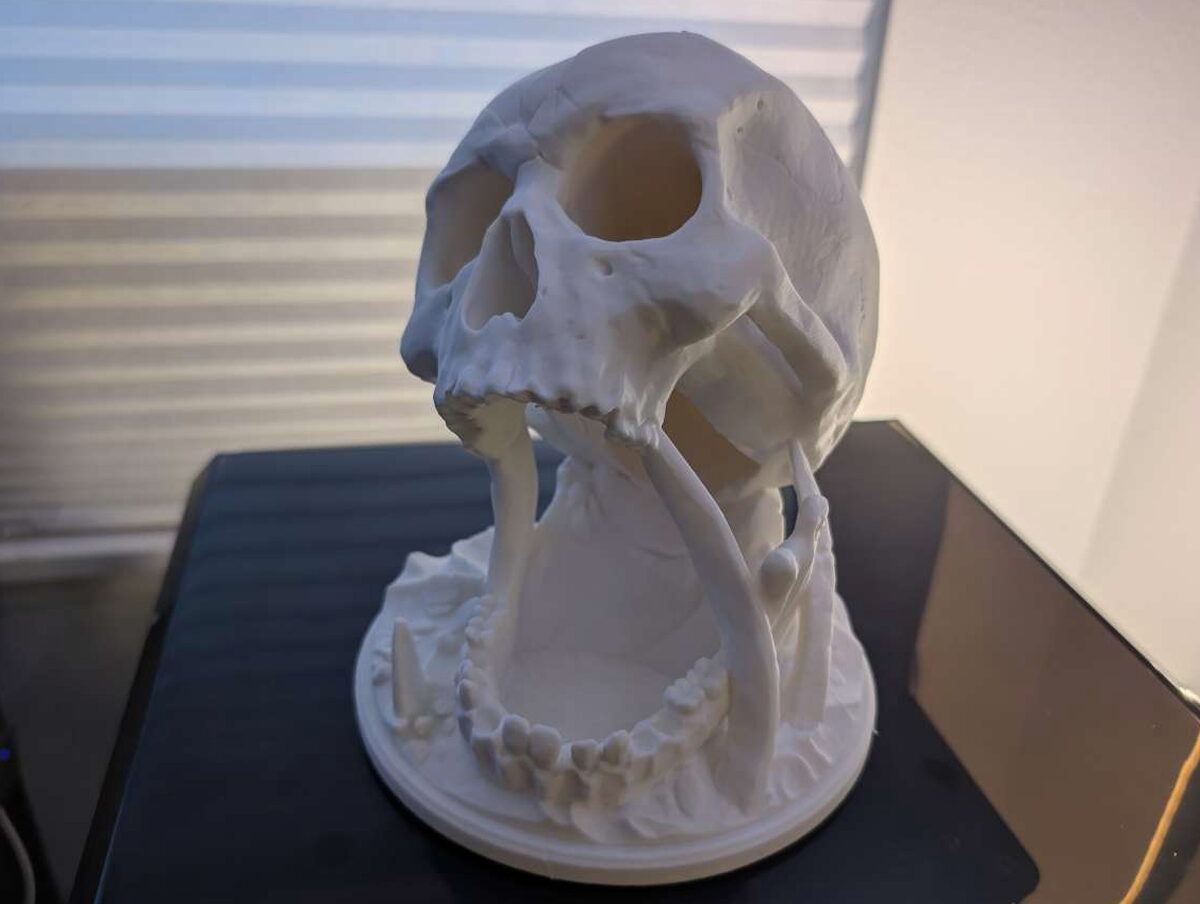
The standout print was a detailed Human Skull Dice Tower in Matte White PLA. I used higher infill than usual to give it more weight, and the printer captured the fine details extremely well.

In good light and up close, that dice tower does not immediately look like something from a home printer. The surface detail and overall finish were that strong.

Software and network printing
The Elegoo slicing software took a little time to understand because the instructions were not as clear as I wanted. After I had it configured correctly, it became a powerful part of the workflow.
The best software feature is network printing. Connect the Centauri Carbon to WiFi, enter its IP address in the Elegoo software, and sending a file is basically a press-to-print process. After the file is sent, you can still adjust options, and the software keeps a history of previously printed files.
More test prints and time-lapse videos
Here are the additional photos and time-lapse videos from the good and bad prints I ran through the Centauri Carbon.
Print-in-place Block Robot

Torture Toaster fail

Human Skull Dice Tower
3D Benchy Test

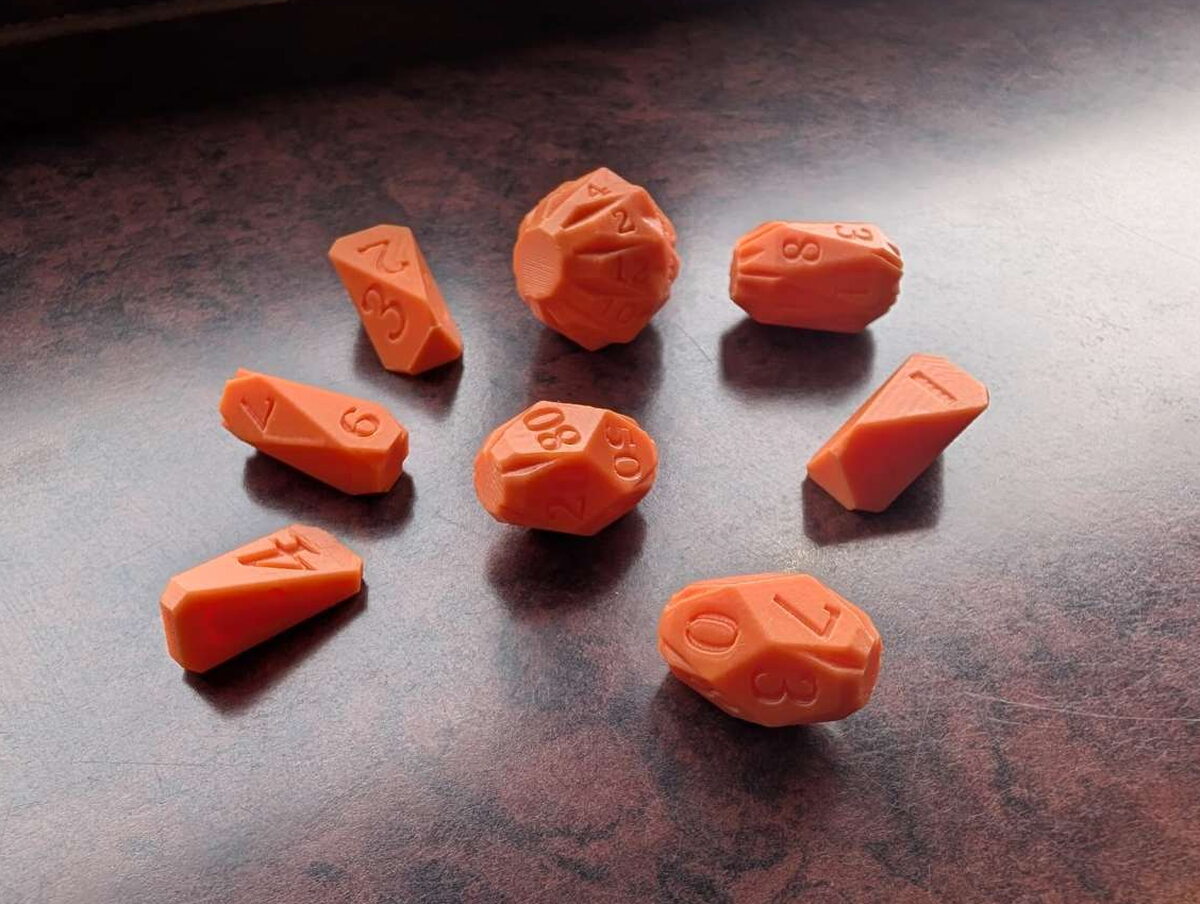
RPG Faceted Dice Set
Transparent Skull

Baby Groot

The Good
- Ready to print with very little setup
- Consistent print quality once configured
- Very fast and accurate prints
- Rigid mostly aluminum enclosure
- Convenient WiFi printing and built-in monitoring camera
The Not So Good
- Needs a sturdy table because fast print head movement can shake the surface
- Glass top should have a hinge or built-in storage spot
- Setup and software instructions could be clearer
- Fans can get loud
- My sample arrived with a bent frame, which I believe happened in shipping
Quick Questions
Q: What’s the Centauri Carbon’s build volume?
A: 256 x 256 x 256mm.
Q: Does it connect to WiFi for remote printing?
A: Yes, network printing over WiFi is one of its standout features, letting you send files and monitor prints without physically loading a USB stick each time.
Q: What materials can it print?
A: PLA, PETG, TPU, ABS, and carbon fiber filaments, with a nozzle that reaches 300C.
Q: Does it have a filament cutter?
A: Yes, an integrated cutter in the extruder can automatically cut and retract filament.
Verdict
The Elegoo Centauri Carbon is one of the most convincing consumer 3D printers I have used. It is approachable enough for a beginner, but it does not feel like a beginner-only machine. The sturdy mostly aluminum body, enclosed chamber, fast Core-XY motion system, flexible PEI plate, filament cutter, waste handling, time-lapse camera, and network printing all make it feel polished and practical.
I still want a better top glass solution, clearer documentation, quieter operation, and a front-mounted power switch. I also cannot ignore that my unit arrived with a bent frame, even if I believe shipping was the likely cause. Those issues do not outweigh the print quality, speed, and everyday convenience I got from it. At $299.99, the Centauri Carbon is easy to recommend and has earned a regular spot in my workshop.
This isn’t the only one I’ve put through its paces. Check The Best 3D Printers I’ve Tested (So Far) for the full lineup.
Price: $299.99
Product Link: Elegoo
Source: The sample of this product was provided for free by Elegoo.
Elegoo did not have a final say on the review and did not preview the review before it was published.


