
REVIEW – Overlanding trips have a way of taking me exactly where my phone stops working. Gorgeous scenery, zero bars, and no way to check in with anyone until I’m back near a town. Bolton Technical sent over the Velocity Off-Road Vehicle Cellular Signal Booster to see if it could fix that, and after mounting it in my Tacoma and driving it through some genuinely dead zones, I’m sold enough that I’d have a hard time going back to a phone with no signal in the truck.
What’s in the Box
The Velocity ships in a long, plain cardboard box, no branding to speak of beyond a shipping label.

Inside, the Blade antenna and Velocity booster each get their own retail packaging, and Bolton throws in a yo-yo, of all things, with a card pointing you to their support line.

Laid out, the full kit is a lot more hardware than I expected: the booster itself, the off-road antenna, a flat interior antenna, two different mounting systems, a power cable, and a bag of extras.

- Bolton Velocity Signal Booster
- Blade Antenna
- Antenna coaxial cable (13ft.)
- Antenna Adapter FME-Female to SMA-Female
- Inside B-Flat Antenna (10ft.)
- RAM Track Ball with T-Bolt attachment
- Kewig Bar Clamp Mount
- Antenna Quick Disconnect
- Accessory Mounting Pack
- 12V DC Power Supply
- User Manual
Specs You Should Know
- Uplink (MHz)
- 698-716
- 776-787
- 824-849
- 1710-1755
- 1850-1915
- Downlink (MHz)
- 728-746
- 746-757
- 869-894
- 1930-1995
- 2110-2155
- Input/Output Impedance: 75 Ohm
- Maximum Gain: 50 dB
- Max Uplink Power: 29 dBm
- Noise Figure: ≤5 dB
- VSWR: ≤2.0
- Gain Adjustment: 20 dB (Automatic)
- Maximum Output Power: 1 Watt EIRP
- Cable Type Outside: RG-58U
- Cable Type Inside: SC-174
- RF Connectors: FME male (both ends)
- Power Consumption: <10W
- Dimensions: 5.625″ x 4″ x 1.125″
- Weight: 1.43 lbs
The Booster Unit
The Velocity booster is the brain of the kit, a solid metal brick with cooling fins running across the top and a genuinely sturdy feel to it.

One end has the connection for the interior antenna along with the DC power port.
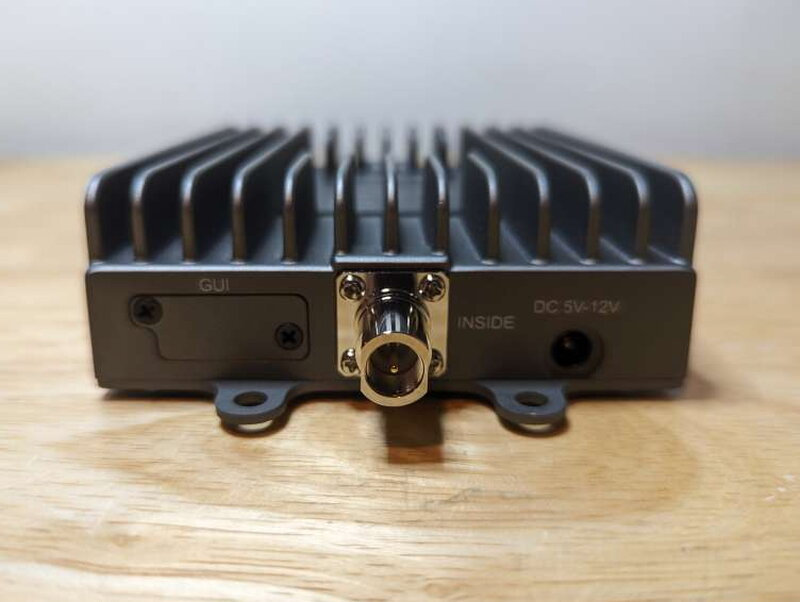
The opposite end has the connection for the exterior antenna, the one doing the actual work of grabbing a weak signal.

The LEDs on top tell you what’s going on: solid green means everything’s normal, flashing green means the automatic gain control is adjusting itself for a strong nearby signal, and flashing red means something’s off, usually a sign to reposition the exterior antenna.

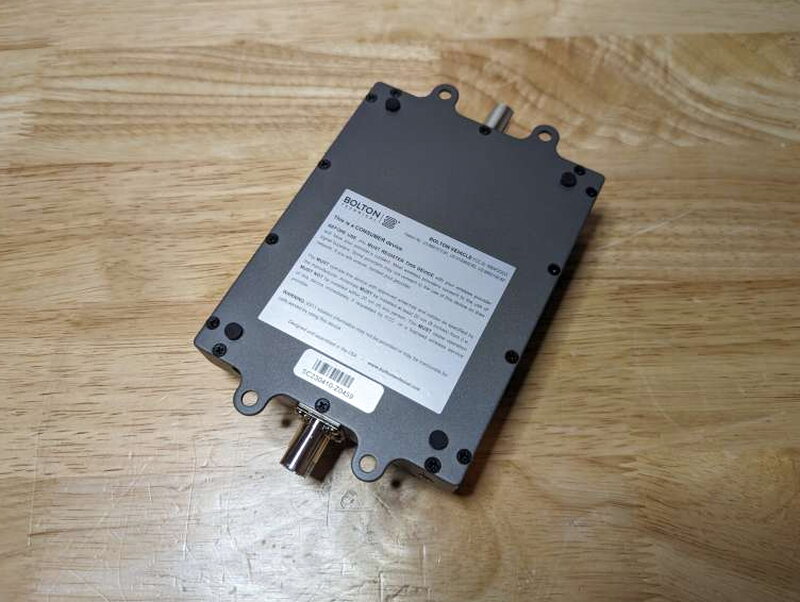
Flip it over and there’s the regulatory fine print about registering the booster with your carrier, plus four mounting holes for bolting it down permanently.
The Blade Antenna and Cabling
The 13-foot exterior coax cable connects to the booster through an FME-Female to SMA-Female adapter.
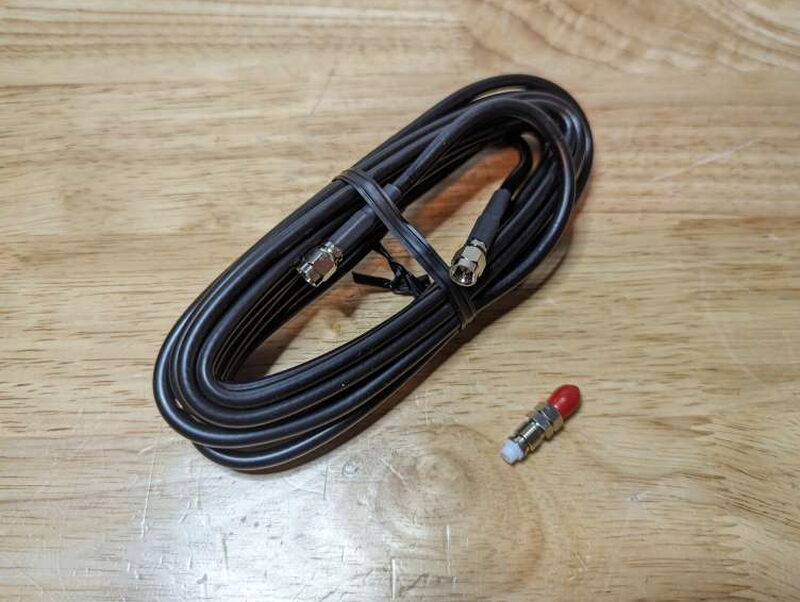
The adapter threads onto one end of that cable, and the other end runs straight to the antenna itself.

The Blade antenna itself is rubber-coated fiberglass, shaped to cut down on wind noise at highway speed.


The base is a 3/8 x 24 threaded stud with a coaxial connector, and it ships with a rubber cover already fitted so the mounting washer doesn’t slide off in transit.

Three Ways to Mount the Antenna
Bolton gives you three different ways to get the antenna onto a vehicle, and all three funnel into the same RAM Double Socket Arm.
Screw the RAM Tough-Ball onto the antenna’s threaded base and it locks into one end of the double socket arm.

The RAM Double Socket Arm itself has a knob on one side to clamp both balls down once they’re seated.

Option one is the Kewig Bar Clamp, which wraps around any round bar-shaped surface, like a roof rack tube.

Option two is the RAM Track Ball with a T-Bolt attachment, which is what I ended up using since my roof rack has a mounting track built in.

Option three is a plain L-shaped bracket with four bolts, for anywhere the other two don’t fit.

The Interior Antenna and Power Cable
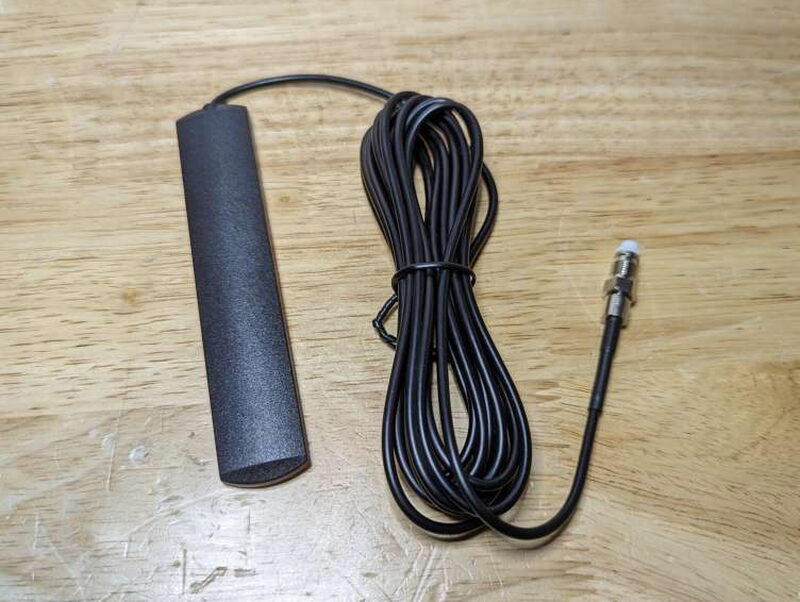
The flat interior antenna comes with ten feet of cable and a 3M adhesive strip on the back for sticking it to the dash.
Power comes from a 12V cable with a cigarette-lighter plug and an inline on/off switch.

A closer look at the switch itself, which lets you kill power to the booster without unplugging anything. Bolton also sells a hardwiring kit separately, which honestly feels like it should just be in the box at this price.

Here’s the booster fully powered on and cabled up on the bench, all five band LEDs and the power light glowing solid green.

Getting It Onto the Tacoma
My install truck is a 2022 Tacoma TRD Pro with a roof rack, which made the exterior antenna mount straightforward and the cable routing the only real chore.

I laid everything out in the bed first: booster, antennas, cables, and all three mounting options, so I could see what I was working with before committing to anything.

I built the exterior antenna mount first, snapping the double socket arm onto the Tough-Ball and Track-Ball on either end.

I popped the protective cap off the antenna base and threaded the Quick Disconnect fitting onto it.

Then I test-fit the Tough-Ball onto the assembled base to make sure everything would seat correctly once it was up on the roof.

With the mount built, I popped the antenna itself back off using the Quick Disconnect, just to make the actual roof install easier to manage.

Up on the roof, the rule of thumb is to keep the interior and exterior antennas as far apart as the vehicle allows, so I spent a few minutes scouting the best spot on the rail.
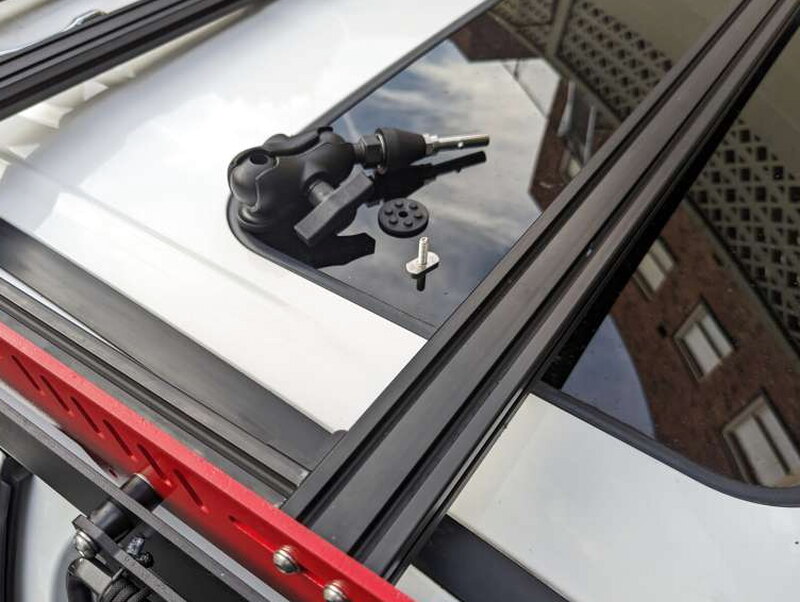
My first instinct was to mount it on the top rail so the antenna stood straight up.

Then it clicked that the RAM mount is flexible enough to slide into the side track instead, which tucks the antenna down and out of the way when I’m not using it.

A rubber lock washer slides over the T-Bolt and locks in a snug fit once it’s paired with the Track Ball.

With the Track Ball locked in, I reattached the roof rail and gave every connection a tug to check it was solid.

Tightening the big knob on the double socket arm clamps down on both the Track Ball and the antenna’s Tough Ball at once.

With two ball joints in the mount, I’ve got a lot of freedom in how I angle the antenna. It doesn’t have to point straight up, even though vertical gives the best reception.

I can also lay it out horizontally for a lower profile when I want it less conspicuous.

And when I’m not using the booster at all, the two-ball joint lets me lay the antenna down flat against the rail so it’s out of sight.

From inside the cabin, the mount and cable are barely noticeable through the sunroof.

Routing the Cable and Wiring In
Then came the tedious part, running the cable. A KC Hilites Universal Wire Hider let me tuck the antenna cable down alongside the windshield trim and into the engine bay without drilling any new holes in the roof, then I found a spot on the firewall with an existing rubber grommet and used it to feed the cable into the cab without adding a new penetration point.

From under the dash, it took some fishing to find the cable end and route it up. I pulled the dash trim back to get at the wiring, and temporarily set the booster on top of the dash to hook everything up.

Once the cable was through, I connected it to the booster right there on the dash before deciding on a permanent spot.

Bolton suggests tucking the booster under a seat or behind the dash as long as there’s airflow. I ended up wedging it down low near the HVAC ducting, plenty of room and out of sight.

Once the booster was powered up and every LED had gone green, the last job was placing the interior antenna. It needs to sit within two to three feet of where a phone usually ends up, at least eight inches from any cellular device, and at least four inches from metal. I stuck it above the stereo with the included 3M adhesive.
Antenna mounted, booster tucked away, interior antenna in place; everything was set and ready to test.
Signal Numbers, Before and After
Using the Network Cell Info app on Android, I logged before-and-after readings, and the difference was hard to miss. The Velocity supports every major North American carrier, AT&T, Verizon, T-Mobile, US Cellular, and more, and being on Google Fi, I was glad to see it work with mine too.

Before I ever switched on the Bolton Velocity, my cell signal was sitting at -106.

The moment I powered up the Velocity, my signal climbed by roughly 20-30 points every single time.

Since I live in a big city, my baseline signal jumps around a fair bit, but it usually sits somewhere in the -120 to -90 range.

With the Velocity switched on, though, I kept pulling stronger readings, sometimes landing anywhere from -85 to -60.
Installing the Bolton Velocity turned out to be one of my better calls, and it’s clearly built with exactly my situation in mind. Under most conditions I get a huge jump in signal strength, and it covers pretty much the whole cabin.
What I Liked
- Off-road antenna and multiple mounting options offer real versatility
- Works right out of the box, boosting signal significantly
- Indicator lights make troubleshooting straightforward
What Could Be Better
- Would be nice if it had a companion app
- Requires fairly specific antenna placement in the vehicle
- Should include a hardwiring kit, not just sell it separately
Quick Questions
Q: Which carriers does the Bolton Velocity support?
A: All major North American carriers, including AT&T, Verizon, T-Mobile, and US Cellular.
Q: Does it include a hardwiring kit?
A: No, that’s sold separately, which the review calls out as something that should be included at this price.
Q: How much did the signal actually improve in testing?
A: Signal jumped noticeably every time it was powered on, from around -106 dBm to about -80 dBm in one test, and from roughly -101 dBm to -76 dBm in another.
Q: How many ways can the antenna be mounted?
A: Three: a bar clamp, a RAM track ball mount, or a flat L-shaped bracket, all compatible with the same RAM double socket arm.
Bottom Line
The Bolton Velocity Off-Road Vehicle Cellular Signal Booster fits right into my Tacoma Overlanding setup. Holding onto a solid cell signal way out in the middle of nowhere makes every trip better, and the Bolton dependably lifts my signal even when I’m down to a single bar. The off-road-specific antenna and bracket options made this an easy choice, and saved me from hunting down a custom mounting solution on my own. I’d still love to see a companion app the way some competitors offer, but at $549.99 the Velocity backs up its promise of keeping me connected far from anywhere.
Price: $549.99
Product Link: Bolton Technical
Source: The sample of this product was provided by Bolton Technical.
RATING: 4 stars


